05 February 2012

POTW 2012 - Week 5 - Sweets

Not all that much to say about this week's shot, except I wanted a subject that I could light through. This fit the bill nicely:

POTW2012_GCF_WK05

Rock candy, FTW!

Setup is light behind the subject, in the form of a small softbox, with a bare speedlight hitting the candy head-on, to light up the stick a little bit.

To either side of the subject are black flags, to give the edges some definition.

200mm (320mm APS-C equivalent) at ISO 100, 1/250, and f/11. The light at the back is set at around half-power, the speedlight is set to 1/16.

The setup looks like this:

POTW2012_GCF_SETUP_WK05

One of the advantages to this shooting style, where the background is completely blown out is recomposing in post is easy. Extend your canvas, fill it with white, and drop the shot where you want it. No extracting necessary.

I added the vignette in post, and it's the first step toward turning this shot into a retro candy advertisement.

28 January 2012

POTW2012 - Week 4 - Shadow

My intent for this week's theme dovetailed nicely with my intent to try stand developing for the first time.

Stand (or, in this case, semi-stand) development uses a very dilute developing solution, and very little agitation. It's used as a compensating development method to bring out shadow detail and increase apparent dynamic range. By letting the film sit undisturbed, the highlight areas develop quickly, but exhaust the developer touching them just as quickly. The shadow areas develop much more slowly, and can sit undisturbed for long periods of time without depleting the active developer. In this way, your highlights don't blow out, but you can still see details in the shadows. It's one part exposure, by exposing correctly for the shadows, one part developing, and three parts patience. Letting a roll of film sit in the tank for forty minutes, only agitating once at the beginning and once halfway through was a new one for me.

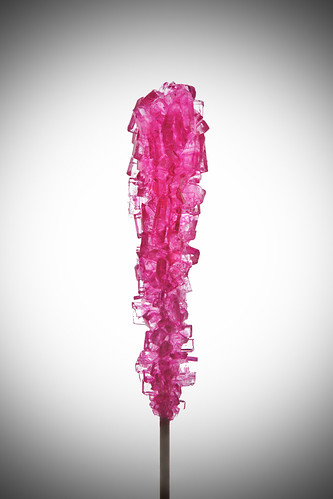
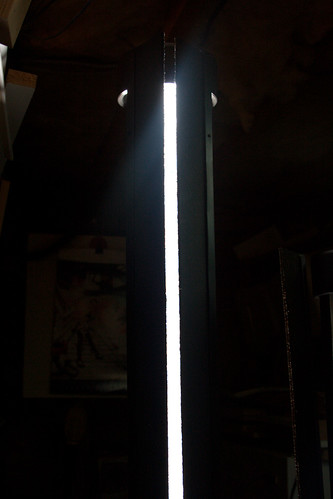
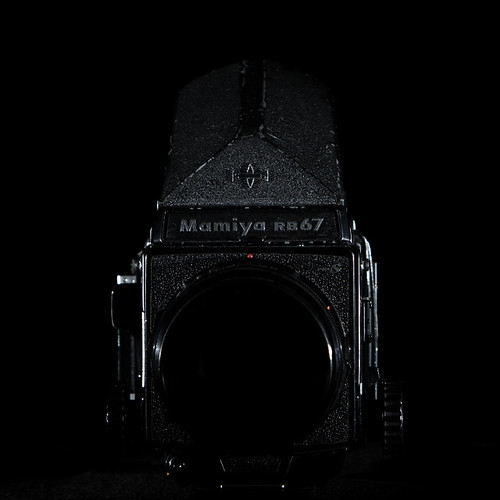
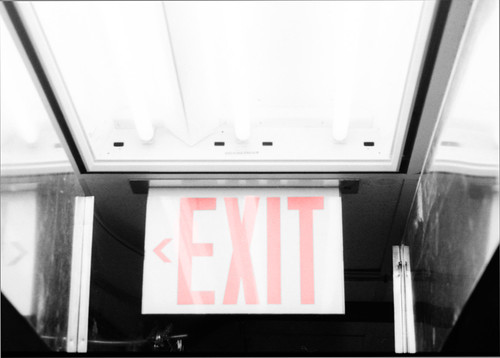
I will point out that I don't think I was completely successful - the highlight areas in image below are, obviously, not blown out, as there's quite a bit of detail in the light fixture. The shadowed areas, frankly, could be a bit darker. I did 'shop some color back into the image. It needed something, and the clearest picture I had in my head of this composition was the red "< EXIT" on the sign.

IMG_0021_edited-1

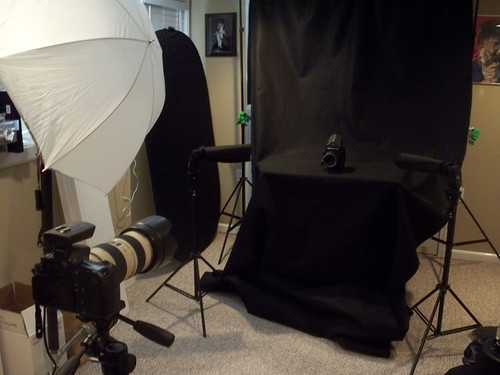
So, no setup here, film and all, but, this is my "recipe" if you will:

Exposed to put the shadows in Zone III (I metered on the ducts, to the bottom-left of the sign)
Developed in 600ml 68-degree water plus 6ml of HC-110.
One minute agitation, sit for 20 minutes, 15 seconds of agitation, sit for another 20 minutes.
2 minutes in the stop, constant agitation.
5 minutes in Kodak fixer, agitate for first 90 seconds, then 5 inversions every minute thereafter.
5 minutes in Hypo.
5 minute rinse, Photo-flo, 5 more minutes of rinsing


I wish I would have had my 60D with me, to get a comparison shot on digital. I'm fairly confident saying that if I had made the same shot, at the same settings, you would have seen the shadows, but the light fixture and surrounding ductwork would have been clipped.

16 January 2012

DIY Strip Lights

I've wanted strip lights for a while now, but the dang things are expensive, so I started in on a build to rig up a couple.


Here's what I used:
  • (2) 54" pieces of 4" PVC
  • (2) 4" PVC Caps
  • (2) 2" L-brackets
  • (2) 4" L-brackets
  • (4) Self-closing overlay hinges
  • (2) 1/4"x20 wingnuts
  • (1) 2' x 4' sheet of hardboard (clip board material) cut into 3" strips
  • (8) 1/8" aluminum rivets with a 1/4" grab
  • (16) Total feet of drop-ceiling L-channel
  • Some wood
  • Some screws
  • Some nuts, bolts, and washers

This is what they look like all done and whatnot:

StripLights-20120128-1

Painted the insides gloss white, and the outsides and barndoors flat black.

Popped the flash:

StripLights-20120128-2

Some burn at the bottom, but it's much more even than my first test shots. I have some small convex mirrors on order that I'm going to mount in the cap to try to even things out a bit.

This is a shot with the barndoors partially closed:

StripLights-20120128-4

And, finally, a shot with the door closed completely:

StripLights-20120128-3

Yes, the flash did fire - I'm pleased to see I have very little light leaking out.

14 January 2012

POTW2012 - Week 2 - Orange

I had a few ideas bouncing around in my noggin for this one. With "orange" as the theme, I obviously considered oranges (and there's a bag upstairs now), a construction area (no shortage there), cigarette tips, things on fire, the usual.

I decided, however, to make an image that was my first impulse, and one that I'm sure everybody with a camera tries at some point - I shot smoke:

POTW2012_GCF_WK02

While smoke isn't orange, I did reckon I could take any decent captures into Photoshop® and make them orange. So there.

My first edit was boring - just a quick orange layer in "Color" mode and the smoke turned orange. Since that was tremendously underwhelming, I pulled a yellow to red diagonal gradient across the color layer instead. That's much more satisfying.

Setup for the shot is easy, if a bit stinky:

POTW2012_GCF_SETUP_WK02

On the table are three burning incense sticks. Both big strobes are snooted, and blasting through the strobes to strike a black flag on the other side. The flag prevents any spill on the background.

The camera is set to manual, ISO100, 1/250, f/6.3, and 80mm (128mm in APS-C terms), and fired with a wired trigger. I grabbed over 100 frames, and this was one of the 20 or so keepers.

Two weeks down, but I don't think I'm done playing with these smoke shots yet.

01 January 2012

POTW2012 - Week 1 - A taste of Vintage

New year, new challenge, and hopefully some new techniques to attempt.

This week's theme is "A Taste of Vintage", and, while I wanted to go with the double entendre and provide a food-themed picture, I could not come up with a suitable subject. I do have "vintage" food in the 'fridge, but it's suitable for neither consumption nor composition.

Instead, I give you my battered old workhorse, the only medium-format camera I own, and one of the nicest cameras I've ever used, the Mamiya RB67 ProS.


POTW2012_GCF_WK01

Lighting on this was relatively simple, and came together quickly. Two Canon 430EZ flashes, at 1/32, and through some homemade snoots, at around 45-degrees to the front of the camera.

The shot was ISO100 at 130mm (208mm with the APS-C sensor) at f/5.6 and 1/250. All light is provided by the flashes.

Setup looks a bit like this:
POTW2012_GCF_SETUP_WK01
And that's it - nothing fancy.

27 December 2011

Fun with UWA Lenses

So, what happens when you have an Ultra-Wide lens, some shafts of sunlight, and a cat who really wants to know what you're doing pointing that big, black box at her?

Something like this:
20111224_SpockNoggin_5x7

An important specification to know for any of your lenses is MFD, or Minimum Focus Distance. The MFD is the absolute closest your subject can be to the focal plane (normally your sensor in a dSLR) while still having the lens able to focus on the subject.

The temptation with an Ultra-Wide is to spin it back to its widest setting, and try to get in as much of the scene as possible. While this is an appropriate technique in some circumstances, it's generally a whole lot more gratifying to use the usually much shorter MFD to take advantage of the inherent distortion in such a lens.

The cat above is quite the butterball, but you'd never know it from the picture. I got down nose-to-nose with her, and shooting at 10mm, got as close I could while still being able to focus. She obliged me (for once) by stretching her neck out to see what I was doing.

Shooting at aperture of f/5.6, to increase DoF (and compensate for any missed focus) I made the shot. If I were using my next-widest lens, which goes as wide as 17mm, I would have had to have pulled the camera back an additional four inches, and it would have looked a more normally-framed shot, and more of the cat's Rubenesque shape would have been apparent.


07 August 2011

Your camera is pretty bright...

...but it's not infallible. Take the following two shots, taken moments apart.

For the first shot, I've let the camera do its thing. It's in Program-Auto mode, and the flash is mounted on-camera, and set to E-TTL mode. I think even the ISO is set to auto-select. Metered on the Birthday Girl, and made the picture.

2011-08-07-18-11-08_Web

As you can see, the exposure is pretty decent. The camera selected a fairly wide aperture of f/4, because it was pretty dark in the room, and aimed for a shutter speed of 1/60, which is pretty standard for the Canon system. ISO ended up at 800, which is good enough. The flash did fire, but, it was pretty low; basically just enough to add a little fill, if I had aimed it straight-on, which I never do.

So, not a bad picture, overall. It's a good snapshot of a very happy event. Unfortunately, I don't like the dark shadows on Gram's face, and there's no detail in the curtains. Technically, it's a rather imperfect shot.

I've got a pretty decent flash that I tote around with me. I'm using Canon's flagship strobe, the 580EX II, and it's got some sauce. I knew that even with a diffuser and at an angle, this flash is more than powerful enough to light a scene of this size without breaking a sweat. With that in mind, I kicked the camera and flash into Manual.

I metered, once again, on the birthday girl, but deliberately underexposed the scene by around four full stops. To compensate for that, I dialed the flash to 1/32 power. I aimed for the same 1/60 second exposure, but stopped down the aperture to adjust the exposure, and to increase my depth-of-field.

2011-08-07-18-14-27_Web

Better, no?

If the flash was overpowering, I would have adjusted the power on the flash. If the flash wasn't powerful enough, I could have opened the aperture a bit, and decreased the shutter to compensate to keep the same ambient exposure.

Overall, it's good to keep in mind that brilliant minds have designed your camera, but none of them are looking at your screen after your shot. Don't be afraid to slip the bonds of auto-exposure every now and then.