31 January 2011

POTD 31 of 365

I really don't care to be on this particular side of the camera - but, I made a deal with myself that I would take one self-portrait per month throughout the course of the 365 Project. That said...

031_of_365

Have I mentioned my fondness for hats, yet?

Lighting on my mug is the 160WS strobe fired into a reflective umbrella, at slightly less than 1/2 (to account for the small aperture). The umbrella helped to get some of the light up under my hat.

Lighting on the backdrop is the 580EX II at 1/16, through a blue cinema gel.

Setup looks a bit like this:

031_of_365_SETUP

Ignore the reflector - I thought I would need it, but, I managed to adjust the umbrella to get the light where I wanted it.

For reference, I was standing around one foot from the tripod.

30 January 2011

POTD 30 of 365

The Missus and I had a "cook-in" this evening - hot dogs cooked over the fireplace, and I wanted to get a shot of it.

030_of_365

This is what went through my mind on this shot:

1. I can expose for the hot dog, and the flames will be blown out.
2. I can expose for the flames, and the hot dog would have been near black.
3. I need to add light.
4. Flames and tungsten lights are a similar color.

No setup, but, light is the 580EX II at 1/64 with the Strobies globe, and a full CTO (see point 4, above).

Turned out OK.

29 January 2011

POTD 29 of 365

Tonight's shot is from a studio session I had with a friend and his family.

This young gentleman was a great subject, and quite a ham:

029_of_365

Lighting is as follows:

160WS into an umbrella, at about 45 degrees to subject.
580EX II at 1/128 with a barndoor, to light the eyes and face.
430EZ at 1/32 onto the backdrop.

Once again, no setup shot, but a Strobox diagram looks like this:

029_of_365_SETUP

This was a fun shoot!

28 January 2011

POTD 28 of 365

When I saw what The Missus was wearing to work today, I asked her (very nicely) if she'd consent to a somewhat formal portrait this evening.

She agreed, and this is what we got (right after I may have inferred that I was One Handsome Devil):

028_of_365

There were a few other shots that were acceptable, but I really like this one.

I don't have a real setup shot for this, but, I do have one I rigged up in Strobox, which is a great FREE app for the iPhone.

028_of_365_SETUP

The lighting is like this:

160WS strobe, fired into a reflective umbrella, set high and at camera left.

Silver reflector at camera right, even with The Missus, to fill in shadows.

The 580EX at 1/128, snooted, behind The Missus as a hair light.

27 January 2011

POTD 27 of 365

Tonight, I am my own GoBo!

A shot of some boots and a hat was rather boring - I tried to spice it up a little with some lighting, but, it was still boring.

I wanted to add another layer of interest to the shot, so I setup a flash way behind me, and put on a hat (I am a big fan of hats!).

027_of_365

The lighting is two bare flashes, fired with the cheapies. The 580 is at 1/128 an zoomed to 50mm, aimed right at the boots.

The 430EZ is at 1/8, at its widest setting, and setup way behind me. Set the camera for two seconds, hit the shutter, and got into position.

Setup shot is here:

027_of_365_SETUP

You can make out the 430 in the extreme foreground.

I'm thinking this one might look nice as a textured sepia shot...

26 January 2011

POTD 26 of 365

Another night, another macro, and another red M.

026_of_365

Lighting was the worklight placed in REALLY close. Reversing ring on the 18-55, stopped down to f/22, and half a second.

I also tried a new trick with the tripod, and mounted the camera between the legs. Pretty cool stuff - can't wait to try more shots from strange angles.

Setup:

026_of_365_SETUP

Tomorrow, we'll try something that's not candy-coated chocolate.

25 January 2011

POTD 25 of 365

Not macro tonight, but, it's a shot I've been wanting to take a swing at for a while.

025_of_365

This is one of the few times I can come up with where your camera matters - this is a pretty severe crop from the full frame - I'm only using about a quarter of the pixels in the frame, which does account for the softness in the image, however, if I'd gone with my Rebel, I don't think I would have had the pixels to pull this off, at least not without oversharpening it in Photoshop.

Lighting was really simple - hand-held 580EX II at 1/128, angled into the candy.

Setup is here:

025_of_365_SETUP

Mmmm...candy.

24 January 2011

POTD 24 of 365

Well, quite a bit of setup for, quite frankly, a let-down, and, to go one better, my grinder pump is acting up (again) so I'm in a pretty foul mood about tonight's shot.

024_of_365

Combined the lighting from the scotch shot with a modified take on the lighting on the goblet shot.

Worklight under the glass plate, 580EX II with a Fong Lightsphere at 1/8 behind the posterboard.

I also angled the glass pane and attempted to get the camera at a matching angle, but, the effect is a little too subtle. What should have been a bit of a head-scratcher instead looks like a mistake.

In any event, here's the setup shot.

024_of_365_SETUP

Now I'm going back downstairs to do battle with the grinder pump.

23 January 2011

POTD 23 of 365

My intent for tonight's shot was to take a macro shot of a candle flame.

Do you know how mind-numbingly boring a macro shot of a candle flame can be? I wasn't aware, but, I found out, so, I snuffed the candle. Then, inspiration struck:

023_of_365

I setup the flash, angled it up slightly next to the candle, pulled the diffuser panel, and set it to 1/4. Took a few shots to get smoke that I liked, gave it a quick B+W and contrast boost in DPP, and Bob's your uncle.

Setup shot here:

023_of_365_SETUP

22 January 2011

POTD 22 of 365

More macro! Tonight, I tried the workaround for stopping down the lens, and it worked like a champ, although, another thumb would make the job easier.

What I've read says set your aperture in Aperture-Priority or Manual mode, hit the DoF Preview Button, hold it down, and disconnect the lens. Worked as described - I've got the lens stopped down to f/20, which is well past the "sweet spot" on this particular lens, but sharpness doesn't seemed to have suffered much. Perhaps my next attempt will bring it down to f/32 or so.

So, without further blather, tonight's shot:

022_of_365

Lighting was the worklight to camera-left, and a cheap LED flashlight to camera-right, for highlights and a touch of color.

022_of_365_SETUP

The bolts are held together with a twist tie on the bottom, and I rotated the image 90 degrees left from where it was in-camera.

Edit 24-Jan-11: I just crunched a few numbers on this shot, and realized that what you're looking at encompasses about 8mm x 12mm worth of bolt. The APS-C sensor on the 60D is approximately 15mm x 22mm, which means that a simple $10 reversing ring and (arguably) the worst lens Canon produces (18-55 f/3.5-5.6, Mark I) are capable of delivering 2:1 image magnification. Not too shabby.

21 January 2011

POTD 21 of 365

There are six and a half billion people on this planet, and the vast majority of them are probably better photographers than I am. One, in particular, however, inspired me recently with a shot of hers - it was a macro of a cupcake, and I had to restrain myself from licking the monitor when I saw it.

Since I'm not sure if macro is going to be a "thing" for me or not, I decided to get into the game cheaply, and pick up a reversing ring. I have the kit lens from my Rebel sitting around, so I got it with a 58mm filter size to match the lens.

This is the first shot:

021_of_365

What you're looking at is an inkjet printout on plain white copy paper. The font, if you're wondering, is 10pt Consolas.

The DoF on this rig is ridiculously short - but there is a workaround to stopping down the lens that I have to try.

Setup was very basic for this - I angled the worklight across the paper to try to "skim" the light across, which I felt would bring out the paper's texture.

The setup shot is here - note how close the camera had to be to the paper before I could get it in focus. What you probably can't see in the setup shot is that the paper is rotated 180 degrees to get the red text closer to the lens.

021_of_365_SETUP

I'm still not sure how much of this I'll do, but, you can count on at least a few more macro shots as part of this project.

20 January 2011

POTD 20 of 365

Last cat shot for a few days, I promise!

This is Gunner - we suspect she was abandoned because she's amazingly chatty.

020_of_365

When she and I first met, I was at my future in-laws' house, and Mama Missus told me of a friendly cat hanging around. I mentioned that if she happened to swing by while I was there, I'd see if she wanted to come down to Maryland with me.

It probably wasn't more than three minutes later when a skin-and-bones Gunner came strolling out of the woods and came on over. I inquired as to whether or not she'd like to accompany me to Maryland, she replied in the affirmative, and there you go.

Thirteen years and about the same number of pounds later, she's now our Big Girl, and one of the strangest cats I've ever met.

19 January 2011

POTD 19 of 365

So, this is Spock - don't let the name fool you, she's a she. The Missus had always wanted a black cat named Spock, and, when circumstances put a very small, very angry female black cat in our path, I reckoned she wouldn't mind if we called her Spock, so long as she got a good home to go with the name.

She's a little butterball, and really quite lazy, until you stick a camera in her face, and then she won't stop moving.

Complicating this issue is the fact that she's had cataracts since birth, and they're really obvious when you take her picture. As a service to the little fuzz-butt, I wanted to try to get her eyes clear, so I had to persuade her to look down a little bit, to keep the light from hitting the cataracts head-on.

019_of_365

I don't want to give the impression I'm not working at this - this particular shot was one of 36 shots this evening I took to try to get this cat to sit still long enough to take a picture.

18 January 2011

POTD 18 of 365

I got started a little late tonight, and one of the catters followed me into the pstuedio. Rather than setup an elaborate lighting rig to take a picture of an apple, I pet the cat for a little bit, settled him down, and took this:

018_of_365

OK, it's a picture of the cat - no big deal, but, if you'll forgive me, it's a serious picture of the cat.

For one, I struggle with horizon control in my shots. I tend to center the horizon in the viewfinder, getting it mostly level, and I let 'er rip. That's not the best way to take a photograph. I tried to fix that in this one.

Leading lines are nice - I actually did swing the cat around on the rug (don't worry - he loves that!) until the lines in the carpet were pointing at his face.

Lighting was very basic for this - on-camera 580EX II in TTL mode, with the strobies globe on top.

No setup shot - it's not that serious a picture!

Oh, and if anyone's interested, The Missus and I did get Chinese food last night, and it was delicious!

17 January 2011

POTD 17 of 365

The Goblet makes its triumphant return!

When I was mixing up the faux absinthe yesterday, I loved the way the drops of food coloring reacted in the water.

Today's shot was supposed to have been a mix of decent photography and some 'shopping skills, unfortunately, I got bored with the 'shopping aspect, and set the shot back up and took another.

This is today's (unshopped) image:

017_of_365

When I set the shot back up, I changed the lighting around to do something different. I asked myself, "Geoff, what if your background was your light source?" Then I asked myself "Geoff, what are you making for dinner tonight?" Then, I answered myself "I don't know, let's try it, and, maybe The Missus and I will go for some Chinese food."

Right - lighting. The 580EX II at 1/16 with a diffuser, fired into the back of the white posterboard.

Setup shot:

017_of_365_SETUP

Will the goblet be back?

Will I try this shot again to minimize the vignetting at the top right?

Will The Missus and I get our Chinese food?

The answer to these questions and more will be revealed - stay tuned!

16 January 2011

POTD 16 of 365

Ah, absinthe - the drink that fans have been using to explain artists' alternating genius and stupidity since the 17th century.

I'm not a fan of the anise flavor, nor do I put any stock in the so-called hallucinogenic effects of absinthe (to be sold in the US, absinthe must be Thujone-free), but, I will not deny the mystique that surrounds the Green Fairy.

It also makes an interesting subject:

016_of_365

Light is provided by two flashes, triggered by the cheapies.

Key on the goblet is the 580EX II at 1/128, snooted, and aimed directly down.

Key on the bottle is the 430EZ at 1/32 (its lowest setting), turned vertical, and aimed from the backdrop out. I adjusted the height until I got the two light spots on the surface to merge cleanly.

Setup shot:

016_of_365_SETUP

Note that what's in goblet is NOT absinthe - simply water with some food coloring. Also note that if you were to try to consume that much absinthe in one sitting, you may very well begin to hallucinate, because the drink is potent. So much so that's it's normally diluted 4 parts water to one part absinthe.

On the chance that there's an absinthe fan reading this, yes, I know, I'm missing a a pitcher of ice water. I thought about it, but it would have cluttered the composition.

15 January 2011

POTD 15 of 365

They (whoever "they" are) say, "Necessity is the mother of invention." My need this evening was a clean composition of the whirligig that The Missus has hanging in the dining room.

I tried a few different angles, all of which had some combination of teapot, blinds, bookshelves, or corners in it. Tried opening the lens up wide to blur out the background - no love.

In a moment of pique, I mounted the camera on the tripod backwards, angled it to 90 degrees, and awkwardly positioned it under the whirligig. Composed, switched to manual focus to get the center and very edges in the focal plane, and let 'er rip.

Here's the result:

015_of_365

No real setup shot, but light is the 580EX II with a softbox at the level of the whirligig and at 1/32.

This is what the thing looks like from a normal angle.

015_of_365_SETUP

I rather like the abstractness of this shot.

14 January 2011

POTD 14 of 365

I may have hinted (OK, more than hinted) that you'd see this again.

I like this one more, but, it lost a little punch. I think it's the way that I setup the light inside the helmet. I also did clean the helmet a bit more this time. Any bug-splats still visible can be chalked up to five years and 20,000 miles of riding.

014_of_365

The setup is completely different this time around.

Key is the 580EX II at 1/8 and a mini softbox.

Front fill is the 160WS strobe with a snoot I rigged up using gaffer's tape and a foamie.

Once again, there's a 430EZ at full power with an orange gel inside the helmet. I also stretched a paper towel across the opening for the visor, closed the visor and (not so) carefully trimmed the excess with a razor. When that was done, I mashed all the little fiddly bits left outside the visor back in with the side of a cardboard battery package...

Setup:

014_of_365_SETUP

The camera is at ISO100, 1/200, and f/9.

This may not be the last time you see the helmet, but I'm done with this composition for now.

13 January 2011

POTD 13 of 365

I had some high hopes for this shot, and, I still think it's salvageable.

013_of_365

Two flashes and work light provide the lighting.

Key light is the 580EX II at 1/8 with a Strobies Honeycomb, under and to the right of the helmet, angled up (to keep light off the surface).

A teeny bit of fill is provided by a daylight-balanced CFL spotlight, pointed at the left side of the helmet.

The effects light is a 430EZ at full power, with an orange gel, inside the helmet.

Setup shot:

013_of_365_SETUP

So, what do I need to do better?

Thought I cleaned the helmet - apparently not.

I'll try this with the visor open.

Softer light on the front of the helmet, and I need to do...something...about the light inside the helmet. That especially needs to be much more diffused.

And, I need to go into this shoot with a fully-charged battery in the camera, so I get more than 3 whacks at this before having to wrap it up. I barely made the setup shot tonight.

I suspect I'll be posting another copy of this one tomorrow, because this has the potential to be really cool.

12 January 2011

POTD 12 of 365

Ah, specular highlights, how do we love thee? Let me count the ways...

Oh, right, we don't. Most days.

I grabbed one my old trumpets this evening, figuring it would be a good subject. It's got nice lines, graceful curves, and repeating elements. It's also shiny, which is great great for practicing highlight control.

012_of_365

I did not, however, take into account my meager cleaning abilities, and what should have looked satiny-smooth just looks mottled, thanks to the dust and fingerprints all over the horn.

Pity.

In any event, here's a setup shot:

012_of_365_SETUP

Pretty simple this evening - the 580EX II in Wireless TTL Mode with a Strobies Softbox on the front.

So, that's twelve. I'll probably revisit this one again once I've had the time to really clean up the horn, and I'll tighten up the composition - I got it where I wanted it, but, apparently I didn't want the right thing.

11 January 2011

POTD 11 of 365

Eye Phone

OK, seriously, this one is corny. However, if you've known me for more than 10 minutes or so, you'll be well acquainted with my love of terrible puns.

That in mind, expect more along this line.

011_of_365

Setup shot? No steekin' setup shot. I took a picture of my peepers with the iPhone camera, popped the picture on the screen, and held it in front of the Canon.

Focused and composed in Live View with the screen rotated forward, put the shutter on a 2-second delay, pusha-the-button, and done.

10 January 2011

POTD 10 of 365

The psteudio is a wreck right now, as we're in the midst of undecorating, so, I was bopping around the house this evening looking for something photo-worthy. This is what I found:

010_of_365

This is an HDR composite image - the three originals are below:

010_of_365_SETUP_01

010_of_365_SETUP_02

010_of_365_SETUP_03

I used a free application called Picturenaut to do the combine.

More time behind a computer than I like, but, the results are acceptable.

09 January 2011

POTD 9 of 365

Day nine, and I'm trying a new (to me) technique.

I've lit stuff from above, from the sides, and head-on, but I've never tried to light something from below.

009_of_365

I've got a pane of glass suspended between two stools. On top of the glass is a piece of white poster board.

Below the stools is a small spot light with a daylight-balanced fluorescent flood bulb in it. For this shot, it doesn't matter that it's daylight balanced, as it's the sole light source, but, if I have to mix in a strobe or two, the colors are very close, so it's easier to white-balance. For that reason, it's also my work light when I'm doing any studio work.

The flood is pointed up through the pane of glass, and into the snifter and bottle of scotch.

I've got two black foamies behind the stools, acting as GoBos to keep light from spilling onto the backdrop.

009_of_365_SETUP

I metered on the label, which overexposed the "table" and the highlights in the snifter, so I dropped the exposure by speeding up my shutter a stop.

Since that's done, it's time to relax with a small glass of this evening's subject.

Cheers!

The $200 Studio

So, here's the challenge - can you furnish a basic studio space for under $200? I say you can, let's see what the numbers say.

I'm assuming that you already own a camera and a tripod. If you own a flash, great, if not, I think we can still accommodate you.

This is stuff I actually use in my current studio:


Adding that all up gives you a total of $199, and, chances are pretty good that you've already got at least some of the things on there. If you own a flash and a table, you've just cut $70 off the $200 studio price. You can save another $15 by ditching the felt in favor of some flat sheets out of your linen closet.

So - how do you do it?

Use the gaffers tape and/or pony clamps to attach the felt to your wall as a backdrop.

Put the CTR-301P transmitter on your camera, put the receiver on the 430EZ. Attach the flash and receiver to the light stand, and point it at your subject. Add some fill with the spotlight.

Create flash modifiers with the foamies and gaffer's tape, attach them to the flash head with the Velcro. You can make snoots, barndoors, bounce cards, gobos - almost anything you'll need with white and black foamies.

Use the table as a work surface, put the project board behind small subjects, or use it as a reflector for large subjects. Bounce the flash off the construction paper to add color, or, use the construction paper as a backdrop or surface.

Dial in the flash power, frame and focus, and let 'er rip.

Other things I've read about used as light modifiers are trash bags, windshield sun shades, bedsheets - the list is endless. You can produce great results without spending thousands of dollars in lighting - and, it's portable!

08 January 2011

POTD 8 of 365

This is one of our four cats, Whiskey, and, not coincidentally, the easiest to photograph of the four. He's tremendously mellow about things.

008_of_365

I'll admit to being a bit rushed this evening, because I have some editing to finish up, but, I still wanted to make an image that had decent lighting an a splash of color.

Once again, no setup shot (my apologies) but, this is shot at f/5.6 and 1/40, with an ISO of 2000 (seriously - I'm dumbfounded by the high-ISO performance of this camera).

Flash is on-camera, angled up to 60 degrees, with the integrated bounce-card extended. Most of the light is lost due to the high ceiling, but the bounce-card provides just enough light to bring out the detail in Whiskey's fur, and add tiny little catchlights in his eyes.

I could have pulled this one back a little to avoid cropping out the frame at the top center of the picture. I was, unfortunately, concentrating on getting the picture of Whiskey positioned properly in the frame, so I missed that detail.

He is handsome, though, isn't he?

POTD 7 of 365

Was out recreating this evening, and The Missus (who is a fan of kitsch) pointed out this particular subject.

At the time, I was struggling to get a clear shot of some wavy glass in a window pane, but, when she mentioned this, it was the obvious choice.

I like light. I like color. This has both:

007_of_365

No setup shot for this, because, I took the picture with the lamp in situ, with no additional lighting.

The only thing really noteworthy here is that I focused (and consequently metered) on the globe and adjusted exposure up 1/3 stop. It slightly overexposed the lit part of the lamp, but, it gave me a better exposure for the base and light behind the lamp.

06 January 2011

POTD 6 of 365

Shell Game - Take 2

This one is better. It's not perfect, but, it's compositionally stronger than the first take, the exposure is better, and it's not sitting on the distracting slate tile.

006_of_365

Setup Shot:

006_of_365_SETUP

This is how it went down.

The cup is on a black foamie now - much tougher to overexpose, so, it's more tolerant of any stray light.

The flash is a Canon 580EX II, set to 1/32, and restricted with a barndoor. It's on a cheapie trigger.

I wanted a somewhat ethereal feel for the cup with the Tic Tac under it, so, the sequence was as follows:

1. Turn off the lights. I turned on a very small flashlight, aimed at the back of the room, to give me just enough light to hit the marks with the cup.
2. Start the 20-second exposure, on a 2-second delay. We're at ISO 100 and f/7.1.
3. Shutter opens - scrunch the eyes, pop the flash.
4. Turn the cup just slightly, scrunch, pop.
5. Move the cup to the middle position.
6. Scrunch, pop. Pop again.
7. Move the cup to the left position.
8. Scrunch, pop. Pop again.
9. Remove the cup, wait out the rest of the exposure.

Steps 3 and 4 are what made the right-most cup look a little more translucent.

That's six.

In defense of Photoshop

There are, without exception, more opinions than photographs shared when a few photographers are in the same venue. Very few things, however, get photogs as riled up as Photoshop.

Let me get this out of the way - I don't 'shop too many of my personal images. I'm not anti-Photoshop; I'm just lazy. I look at computers for a living. Big computers, little computers, Linux computers, Windows computers, working computers, broken computers, massive servers and tiny netbooks. All day, every day, computers, so, when I get the chance to be away from my PC, I take it. I shoot digital, so, eventually my stuff ends up on a PC, but I try to spend as little time as possible there.

When do I use Photoshop? When I'm shooting commercially. Commercial photography is about the product, and, generally, your client doesn't care about the process. I promise you that a bride and groom will not appreciate your artistic integrity if it prevents you from skillfully cloning out an offensive element in an otherwise wonderful shot. Sleeping Gramma at an outdoor wedding reception looks a lot like Dead Gramma if a fly lands on her head as you take the shot. (Don't believe me? Do it the other way - 'shop a picture of a fly onto a picture of a sleeping individual. Go ahead - I'll wait...)

Quick quiz:

Which is more "pure"?

For setting White Balance:
A. Setting it in the Camera
B. Adjusting it in Photoshop

For cropping a photo to a different ratio:
A. Using your camera's software.
B. Using Photoshop

For adjusting color:
A. Maxing out your camera's Saturation level.
B. Cranking up the Saturation slider in Photoshop.

If you answered mostly "B", please hit yourself in the face with a full-frame Canon.
If you answered mostly "A", please do the same, except use a Nikon.
If you asked yourself "What's the difference?" congratulations, you get it.

Did you ever wonder where the bright folks at Adobe came up with some of the terms used in Photoshop? Clone, Blur, Dodge, Burn, Masks, etc? They didn't invent these terms; they reused terms already in common everyday darkroom use. Here's a little tidbit you may not have known - Ansel Adams, the only photographer non-photographers know, used dodging and burning extensively (and, I might add, brilliantly) in most, if not all, of his best-known works. He used it enough to write a book about it.

Does the fact that it was done in a darkroom, and not on a laptop, make it any more pure?

Does the fact that it was done at all make his work any less pure?

Before you answer, check your hand to see if you're still holding a full-frame camera.

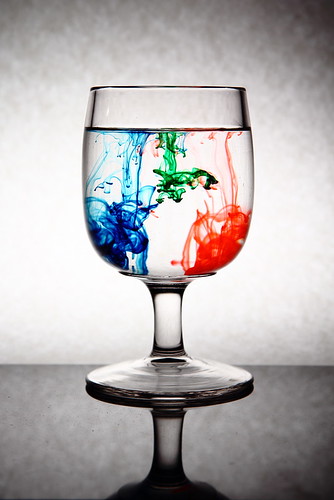
I've seen pictures that were obviously 'shopped, and I've loved them. I recognize that PS would have been the only way to make such an image. The use of Photoshop didn't negate the artist's vision, and didn't magically fix composition, framing, color usage, timing, or creativity.

Photoshop is a tool, like a scalpel, that, when wielded by a skilled individual, can enhance an image. It's also much like a scalpel in that if it gets stuck in your eye, you'll be a bit upset. More on that in a future rant.

05 January 2011

POTD 5 of 365

The Shell Game

I'm not happy with this one, but, I'm going with it anyway because this is my first attempt at such a shot, and the hour groweth late. I did take a few "safe" shots this evening that are perfectly presentable, but, I'd rather get this one up as a reminder of what not to do.

005_of_365

This is how it was done:

I started with a dark studio, one cup, and a Tic Tac. There's a 160WS strobe to the cup's immediate right, and a white bounce card to the cup's immediate left. The Tic Tac is under the cup, and the cup is the rightmost position on the tile.

Start the 13-second exposure, scrunch my eyes shut, and pop the flash remotely.

Move the cup to the middle, exposing the Tic Tac, scrunch, pop.

Move the cup to the left, scrunch, pop.

Pull the cup off the tile and wait out the rest of the exposure.

Setup shot:

005_of_365_SETUP

Obviously, I'd like to get a better exposure on the cups, without overexposing either the Tic Tac or the tile. I believe that's possible if I use a barndoor to restrict the light.

For tonight, I'll take it, and will hopefully learn from it.