Showing posts with label Gear. Show all posts

18 October 2012

Gear Review - Canon 5D Mark III with EF 24-105 f/4L

What have I done?

I rented some gear for an upcoming wedding, because it's an evening wedding in the fall, and my old backup body just doesn't handle low-light very well. My main body, the 60D does a great job, and when it can't handle it on its own, Lightroom picks up the slack. It's been working out well for me, but, if the 60D picks that night to have a fit, I would have been in a lurch. Enter the Canon 5D Mark III, and its (arguably) most commonly-paired lens, the EF 24-105 f/4L IS.

I was really hoping to be underwhelmed by this combination of body and lens. I was kind of hoping I'd put it through its paces and say "Yeah - nice camera, but, it's not worth four thousand dollars." (Just typing that number made me blink, and hard).

I was wrong. It's worth it. The 60D is amazing up to ISO 1600, great at 3200, and salvageable at 6400. I don't run it higher than that, because it's not worth presenting the pictures to a client. In a "gotta get that shot" type of situation, I'd bump it up to 12,800 and hope for the best, but, not at a paying gig.

The following shots have had work in Lightroom done to them - why not, since I'll be doing it anyway?

ISO 6400:

20121018-133126-WEB

This shot was taken at ISO 102,400 (Read that again, it's not a typo)

20121018-133034-WEB

You know what? I can work with that. It needs color work done, or it might get converted to Black and White, but it's usable. At 102,400.

Here's a different shot, taken at ISO 12,800 (an ISO that I would not use on my 60D):


20121018-132153-WEB

I wouldn't lose any sleep over giving that to a client. It's clean, it doesn't have any noise, and, as long as they're not planning on making a massive print out of it, it's roughly a Brazilian times better than most of the camera-phone shots that populate social media.

Speaking of social media, I shot a few new timeline covers with this, purely to test it out:

20121018-125814-WEB

20121018-125826-WEB

And, a shot processed by giving it a gritty feel:

20121018-125208-WEB

Let's keep this all between you and me, though, OK? I've got to figure out a good way to let my wife know that I'm planning on buying a camera that cost more than my motorcycle.

16 January 2012

DIY Strip Lights

I've wanted strip lights for a while now, but the dang things are expensive, so I started in on a build to rig up a couple.


Here's what I used:
  • (2) 54" pieces of 4" PVC
  • (2) 4" PVC Caps
  • (2) 2" L-brackets
  • (2) 4" L-brackets
  • (4) Self-closing overlay hinges
  • (2) 1/4"x20 wingnuts
  • (1) 2' x 4' sheet of hardboard (clip board material) cut into 3" strips
  • (8) 1/8" aluminum rivets with a 1/4" grab
  • (16) Total feet of drop-ceiling L-channel
  • Some wood
  • Some screws
  • Some nuts, bolts, and washers

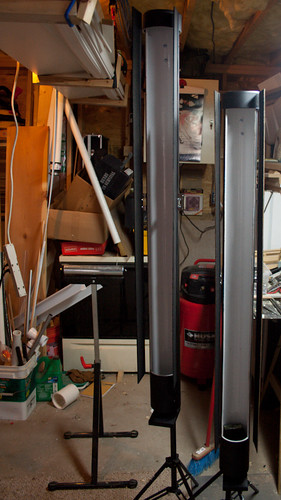
This is what they look like all done and whatnot:

StripLights-20120128-1

Painted the insides gloss white, and the outsides and barndoors flat black.

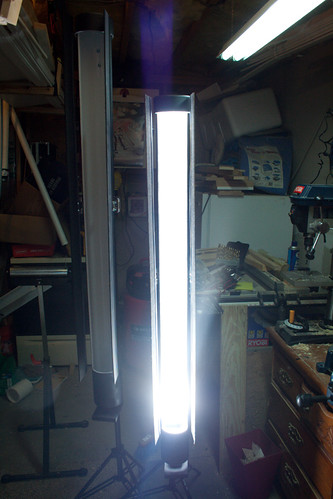
Popped the flash:

StripLights-20120128-2

Some burn at the bottom, but it's much more even than my first test shots. I have some small convex mirrors on order that I'm going to mount in the cap to try to even things out a bit.

This is a shot with the barndoors partially closed:

StripLights-20120128-4

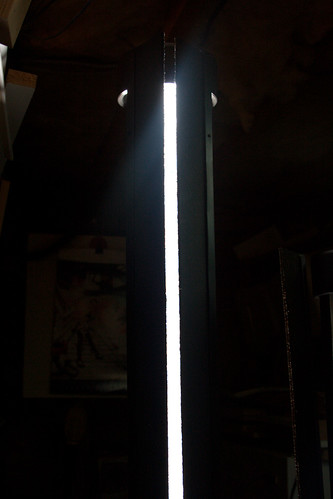
And, finally, a shot with the door closed completely:

StripLights-20120128-3

Yes, the flash did fire - I'm pleased to see I have very little light leaking out.

26 July 2011

Months go by...

So, I'm officially retiring from the 2011 Pic-a-day challenge. Unfortunately, I've been swamped both professionally and personally, and I can't devote the time to these images that they, and you, deserve.

Additionally, most of my personal photography these days is analog - I've been shooting, developing, and now enlarging and printing, a bunch of film. It's a slow process, with roughly a week going by between exposure and final print, so, it's tough keeping a daily schedule.

I will still be posting - this is, first and foremost, a photography blog. Expect more detail shots, more behind-the-scenes and setup shots, and a good bit of darkroom technique, as I become proficient enough to pass it along.

For now, feel free to enjoy a time-lapse video of one of the aforementioned personal projects:


Working on the deck. This was accomplished by setting the camera on a tripod in Aperture-priority, setting auto-ISO, manual focus, and using a "Shoot" brand remote control with an integrated intervalometer. I took one shot every 30 seconds, and combined them into a time-lapse video using Google Picasa.

05 May 2011

POTD 125 of 365

Ho boy. So, I got a damn fine deal on a new piece of equipment. I've been lusting after looking at this lens for a while. I had considered the Non-IS version (to save a few hundred dollars), but, shooting at f/2.8 the other night indoors with the 17-55 proved that I needed the IS, even at high ISOs.

Version II of this lens was just released, so, the price did drop on the Mark I lenses. When one popped up on one of the sites I frequent, at a good price, and with IS, I told my wallet to look the other way and did it.

125_of_365

Yup.

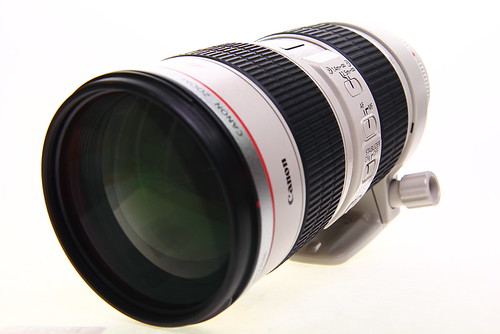
EF 70-200 f/2.8L IS, Mark I

You want speed? It's got it.

You want reach? It's got it.

You want weight? It's got it.

You want bokeh? It's got it.

125_of_365_SETUP2

But since it's not about the gear (right?) let's talk about the shot.

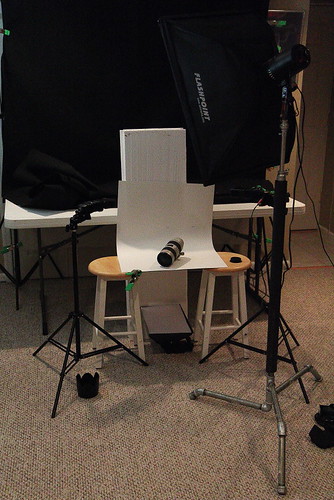
125_of_365_SETUP1

I used a trick I've used in the past to light this.

There's a pane of glass suspended between the stools. On top of the glass is a piece of white posterboard.

Below this setup is the 580EX II at 1/8, through the LTP.

The two 430EZs, set to 1/16, are blowing out the background.

The 160WS Strobe, at a little over 1/8, and through the big softbox provides key on the shot.

Shot at f/8 for detail and the most in-focus areas I could get.

23 April 2011

POTD 113 of 365

Following this tutorial on StudioLighting.net, I built myself a C-Stand today.

113_of_365

Total cost for the stand, pre-tax, from Home Depot, is under $60. To put that number into perspective, the big two camera stores in New York are selling mini Century Stands for around $100 each.

I did modify it a bit, by adding pipe insulation around the base, and ditching the casters. I also dropped two compression springs into the base to cushion the landing a bit if the top tube lets go.

I'm working on adapting a paint brush holder into a boom arm, because this is heavy enough to support a boom with very little counter-weight.

I'm also planning on building a second one of these in a very near future. Light stands are good.

10 April 2011

Gadgets, Gizmos, and Great Service

I've mentioned the Cactus V5 triggers, so, I won't go into any more detail there, except to say that they're going to make lighting my shots much easier, and much safer (for the flashes).

I also picked up two Yashica Electro35 GSN cameras. I bought two because, one, they're cheap, and two, they were made in 1973, so, it'll be nice to have a parts camera if needed. One of the came in the mail the other day, and I've already burned a roll of Tri-X playing with it. The negs look good, I don't see any evidence of light leaks, and it seems to be metering perfectly.

The Yashicas are coupled rangefinders, with a parallax adjustment, and have one of the finest-rated lenses on cameras in their class. They sport a fixed 45mm f/1.7 lens. They aperture-priority only, with a weird metering system that gives you a yellow or red arrow in the viewfinder indicating which way you should turn the aperture dial on the lens for a proper exposure. A left arrow means that you won't be able hand-hold at your current aperture, and a right arrow means you're exceeding the max shutter speed, so stop it down a bit.

Max shutter speed is 1/1000, which is a bit of a bummer, but, they also have a hot shoe AND a PC Sync Cable for flash triggering. How cool is that?

Unfortunately, since I don't have any way of setting the shutter speed, I don't see much studio use for the little buggers, but, they're pretty small and extraordinarily quiet. No mirror slap, no motor drive for the film, and, no auto-focus.

Readers of a my blog get a sneak peek at one of my Pics of the Day. The "real" shot is still rolled up in the 620, but this is the digital cheater shot I took to play with the lighting.

095_of_365_SETUP1

Cool, eh?

Oh - and about that "Great Service" in the title...

Do you live within spittin' distance of Wilkes-Barre?
Do you own a camera?
Do you make prints?
Do you shoot and/or develop film?

If you answered "yes" to at least three of those questions, go throw some business at Professional Photographic Services, on Scott Street, in Wilkes-Barre. Here's their website: www.wbpps.com.

Great folks, reasonable prices, and a local business that supports people in our field. I stopped down on Friday to take a look around (don't expect much looking - it's a counter) and left with some cool film, and some developing chemicals.

They do prints, scans, all sorts of film developing - you name it.

Go there. Do it now!

08 April 2011

POTD 98 of 365

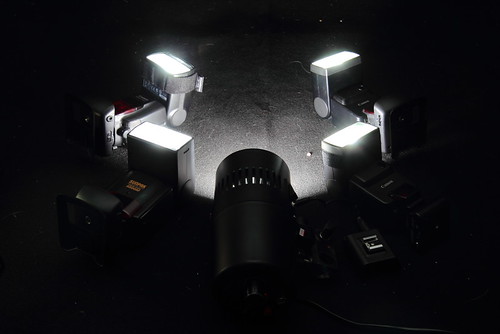
I made mention on my Facebook page that I tested the Cactus triggers, and found out that by mounting the transmitter to the CTR-301P triggers on the Cactus transmitter, I could pop both sets simultaneously.

This is the result:

098_of_365

Clockwise, starting at the bottom center, you have:

The Big Strobe, fired by a CTR-301P.
One of the SunPak PZ5000AFs, fired by a Cactus V5.
The Canon 580EX II, fired by a Cactus V5.
One of the Canon 430EZs, fired by a Cactus V5.
The other Canon 430EZ, fired by a CTR-301P.

I would have included the two other SunPaks, but, I ran out of batteries.

These triggers are fantastic. They were obviously designed with serious small-flash lighting in mind. They boast a hot shoe on top, to mount the flash, a cold shoe and a 1/4" socket on the bottom, to mount to a light stand, a 3.5mm jack to connect to either a PC socket of a 6.5mm jack on strobes, 16 channels of 2.4 gigahertzy goodness, group triggering, and common AAA batteries.

Score!

05 April 2011

POTD 95 of 365

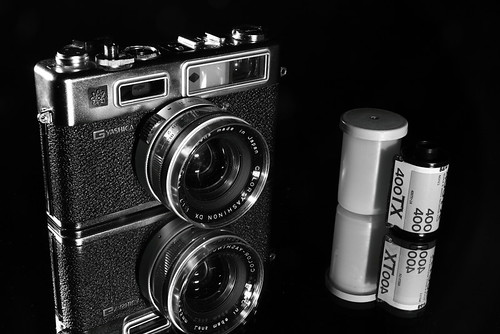
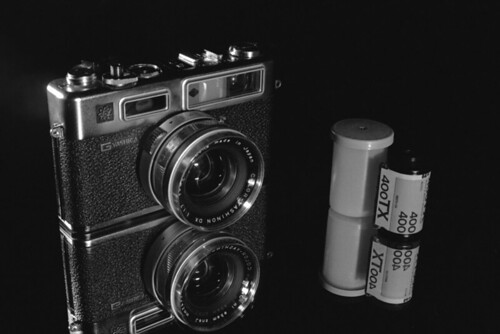
This is one of my new toys.

095_of_365

I've been looking at rangefinders because they're a little lighter, a little simpler, and they're something I have absolutely no experience with.

I researched them a bit. The crème de la crème of rangefinder cameras, Leica, is just a teensy bit out of my price range. The Yashica Electro35 GSN shown here is generally well-regarded, has good optics, and, most important, is cheap. I snagged two of them on eBay for well under $100, including shipping from two sellers.

Oddly enough, the GTN model, while functionally identical, goes for a ton more, because it's all-black and more "collectible". As Nero Wolfe would say, "Pfui". I use my damn gear, and regard anyone who collects the stuff just to have it as a step off.

I've already put a roll of Tri-X through the camera, and exposure and metering are great, but my focus is sorely lacking. I'm not going to blame the equipment yet, because I haven't shot it in a controlled environment, nor have I shot it with my contacts in (the RF diamond is a bit hard to see with glasses).

If I can resolve my focusing issues, this thing is going to be a joy to shoot. It's light, and quiet.

27 March 2011

POTD 86 of 365

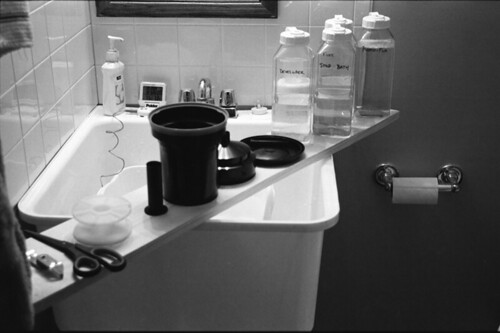
So I shot my darkroom setup, on film, right before I developed the roll.

How meta is that?

086_of_365

From left to right, you can see:

The can opener, scissors, spool, stem, tank, funnel, lid and agitator, chemicals, and a roll of bath tissue. In the back is a digital thermometer keeping an eye on the temperature of the water in the basin.

19 March 2011

Metering, ISO, and you

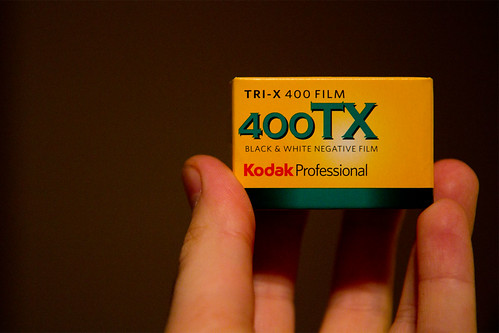
Most of my POTD shots to date have been shot with one of two cameras. If I'm shooting digital, it's the Canon EOS 60D, if I'm going analog, it's the Canon EOS 620 with (so far) Tri-X 400. There is, of course, a reason for that. I really like both of these cameras. They're both big, which is nice because I have meaty paws, they both feel solid, and, oddly enough, the shutter on both just sounds great.

So, what do these two cameras, as different as apples and elephants, have in common? They meter the same. That's important because I'd like to start doing some work with off-camera flash on the film camera.

My testing was not the most scientific, perhaps, but, I suspect it's going to be close enough. Here's what I did:

60D
Aperture Priority Mode
f/5.6
ISO 800
31mm focal length (50mm FF equivalent)

620
Aperture Priority Mode
f/5.6
ISO 800
50mm focal length

I framed the same shot with both cameras, and noted the exposure time. On both cameras, it was the same.

I set up a different shot, metered it with both cameras. Same exposure.

Closed the aperture to f/11 - same exposure time on both cameras.

Opened the aperture to f/4 - same exposure time on both cameras.

I changed the ISO on both to 400 (which is native the Tri-X film) and repeated the above tests. Same exposure from camera to camera.

For a novice film shooter like me, this is huge. I can setup a studio shot with the off-camera flash, dial it in on the 60D, and once I get what I like, can replicate the same shot on film. Is that earth-shattering in the grand scheme of things? Absolutely not! I can, however, see a good use for that when I'm working on some noir images. I suspect they'll look better on film.

Just my little moment of photographic zen for the day.

10 March 2011

Let's turn off the light and see what develops...

I am an information junkie.

Before I purchased a film camera, I researched them, and found one that would be versatile enough to shoot "weird" films (Neither the EOS 650 nor EOS 620 use an infrared film counter, meaning they won't fog IR film).

Before I purchased film, I researched different developing chemicals. I learned the difference between C-41, E-6, and D-76 processes (Color Negative, Color Positive, and Black and White, respectively). I found the most common (but, not necessarily the best) Black and White developing chemicals are the Kodak chemicals, and their clones. Consequently, there was a ton of information I could study about using those chemicals in film developing.

Before I purchased the chemicals and the kit, I read about the process. What I read didn't seem too intimidating, aside from the few steps that need to be performed in total darkness, so, I practiced them as much as I could. There are numerous tips and tricks out there, and I read quite a few. I also dismissed one or two, but, I'll get into that.

Without any further ado, and, if you're interested, this is how I develop a roll of film. Your mileage may vary, don't try this at home, not responsible for trashed negatives, ruined images, or broken dreams. Void where prohibited by law or common sense.

My kit:

- A rounded-end bottle opener
- A pair of scissors
- A digital cooking thermometer with probe
- (3) Rubbermaid Gallon Jugs
- (4) Quart Bottles
- (1) 18-Quart Dish Tub
- (1) Paterson Universal Tank and Reel
- Kodak D76 Developer
- Kodak Indicator Stop Bath
- Kodak Fixer with Hardener
- Kodak Photo-flo
- Film Clips
- The Massive Dev Chart Mobile App

This assumes you've mixed up the chemicals according to their directions. For the Developer, Stop Bath, and Fixer, I mix a gallon at a time in the Rubbermaid Gallon Jugs. The Photo-Flo gets mixed 500ml at a time in one of the quart bottles. All the bottles are marked in multiple locations with a sharpie with their purpose (Developer (D), Stop Bath (S), Fixer (F), Photo-flo (R - for "rinse aid"))

Fill the 18-quart tub with 68-degree water. Put 500ml of each chemical in its respective quart-sized bottle. Making sure the caps are on tightly, put the bottles in the washtub full of water. Leave them in there until the contents of the bottles are at 68 degrees. Hint: Keeping your darkroom at 68 degrees makes this step quick and easy!

In my tiny downstairs bathroom high-tech darkroom, I place a board across the utility sink, and line up the following items, in the following order from left to right:

Roll of film
Can opener
Scissors
Film reel
"Stem" for tank
Tank
Funnel for tank
Agitator rod for tank in the tank lid

Here's where it gets fun.

I put my mobile phone and any other potential light source outside the bathroom. I turn off the lights, close the door, and (if needed) block the bottom of the door with a towel.

Now, I wait. I give myself about two minutes in the pitch black to see if I can pick out any light sources. If I did, I'd fix them. Assuming all is good, then, I start in on the film.

Pop the end of the film roll without the stem off, using the can opener. I toss this in the shower stall. Pull the film out, and I wind it backwards until I get to the spool. Basically, this puts the leader all the way inside the roll of film.

Using the scissors, I cut the tape holding the film to the spool. Films are assembled differently. Tri-X has a nice taped design that makes cutting simple, and you should only have to cut the tape, not the film itself.

At this point, many, many tutorials will tell you to cut off the leader. This is one where I differ from conventional wisdom. I leave the leader on for easier handling later. I don't suspect developing the leader is causing any harm.

Now, I load the film onto the reel, starting with the last frame and working my way up to the leader. The new plastic reels with their ratcheting mechanism make this tremendously simple, but, practice is the key. Buy the cheapest roll you can find and practice loading it in the light before you take a swing at it in the dark. In particular, learn to listen to what it sounds like when the film starts to jam, and learn what it feels like as the film is loading properly (it'll move smoothly forward on the forward stroke, and should just lightly twitch once on the back stroke).

Then, I put the reel on the stem, put the stem in the tank, lock in the funnel (which in theory makes the tank light-tight) and insert the agitator rod.

Then I breathe. I can turn on the lights, wipe the sweat off my forehead, and chuckle nervously. Once that's done, the actual development process begins.

Grab the cell phone, and fire up the Massive Dev Chart mobile app. If you have an iPhone, and you develop film, spend the $7.00 and get this. You will not regret the purchase. If you can't use the app, you'll need to have your times written down, and a stopwatch handy.

For Tri-X 400 in 500 ml of "stock" (i.e. Mixed according to Kodak's instructions) D76 at 20C, this is the "recipe" I use.

Developer
6:45
Agitate for the first 90 seconds, and then for 10 seconds at the top of each minute.
Dump the developer down the drain

Stop Bath
1:00
Constant Agitation
Pour the stop bath back into the 1-quart bottle

Fixer
5:00
Agitate for the first minute, and then for 10 seconds at the top of each minute.
Fixer goes down the drain

Photo-flo
2:00
Constant light agitation
Photo-flo goes down the drain

At this point, I'll pull the funnel and agitator rod out.

Rinsing
10:30
Periodic agitation / dump and refill the tank. Constant flow of clean water

Once that's done, I grab the leader (carefully) and (carefully) remove the film from the reel. Then I (carefully) punch the teeth on the unweighted film clip through the unprinted portion of the film with the tape on it. I unroll the film all the way (although, by this point, it's not too curled up), cut off the leader, and (carefully) put the weighted clip on the bottom of the film.

That's it. I'll let them dry for a few hours, then scan them.
22 February 2011

POTD 53 of 365

Photography has become a bit more than a hobby for me these days. For one, I'm actually taking in a few bucks on the side now and then, which is nice. I'm still deep, deep in the red if you factor in equipment and training costs, but the possibility exists that I might recoup my equipment costs, so, there's that.

Another aspect of my...interest (I hesitate to use the term obsession) is that I'm reading anything and everything I can get my hands about the art and science of photography, and I've taken a step to try to further my understanding of the medium. To that end, and I mentioned this, I picked up an older film SLR, a Canon EOS 620, and today, my first batch of film and developing chemicals came in:

053_of_365

I will be processing all of my own Black and White, and will be trusting my color slides to one of the two local shops that still process E6 chemistry.

Once processed, I'll be using the CanoScan to bring the film into the digital world.

So - more about this shot. Available light (tungsten) at ISO 2000, processed exclusively from a DNG in PS Elements. Not my most compelling or interesting shot, but, the POTD is a great way to document an entire year of my life.

17 February 2011

POTD 48 of 365

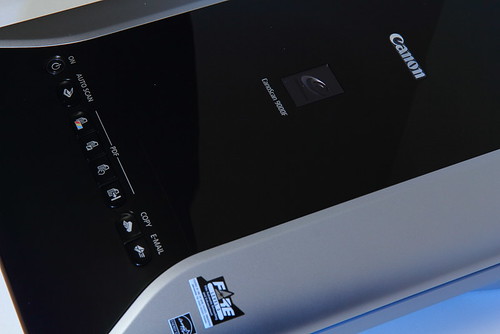
If you happen to have "liked" my facebook page facebook.com/gacphoto, then you'll already know that I picked up a new toy, a CanoScan 9000F scanner. All I can say so far is that it's really shiny. I figured I'd use it in tonight's post to try to control highlights.

048_of_365

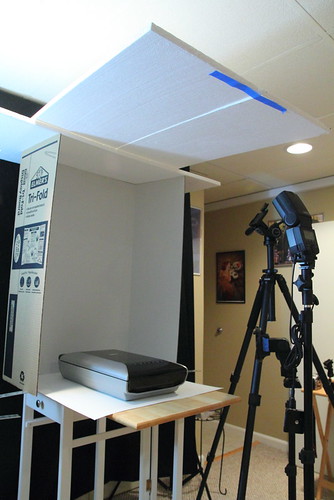
My setup for this shot is my most cobbled-together yet, and that's saying something.

048_of_365_SETUP

There's quite a bit to take in here, and, to be honest, this attempt wasn't entirely successful, but, it tells me what I need to do in the future.

The most important bits in this shot are the two Styrofoam insulation panels I have sitting on top of the third panel and presentation board. They're the actual key light in this shot. The 580EX II at 1/4 and 24mm is fired into them, creating (mostly) one really big light source above the scanner. There's enough spill to turn the sides of the presentation board into smaller light sources, which accounts for the "streaks" of light on the lid of the scanner.

The second light is one of the 430EZs, at 1/32 and 35mm, with a blue gel through a grid, positioned so that the top of the light beam just grazes the top of the scanner, and the rest of the light provides a nice blue glow on the table.

Obviously, a real light tent would have made this shot better, and easier, but that's expensive, and there's hardly any sport in it. Extending the sides of the presentation board would have reduced or eliminated the streaking, so, tomorrow, I'm off to pick up more white posterboard.

Not a bad shot - I'm pretty pleased that you can't see me or the camera in the mirror-like scanner lid, so, there's that.

09 February 2011

POTD 40 of 365

I'll admit that macro photography is becoming a bit of a crutch for me - if I'm pressed for time and/or don't have a workable idea, I bust out either the 18-55 with the reversing ring, or the 50 with the extension tubes (like tonight). I'm trying to stay somewhat disciplined about it, however, and incorporate some combination of color, composition, and lighting.

Tonight's focus (pardon the pun) was, obviously, color.

040_of_365

So, yeah - worklight, extension tubes, and narrow (f/22) aperture.

040_of_365_SETUP

In other photography related news, in the wake of Canon's bevy of new product announcements (T3i, T3 (why, Canon?) two new flashes, and a buncha new lenses, I went out and got myself the 2nd oldest EOS in existence. I picked up a used EOS 620 on eBay this evening, complete with an EF 35-70 lens. I plan on getting into B+W film including my own development, and this camera looks perfect - reliable and simple.

09 January 2011

The $200 Studio

So, here's the challenge - can you furnish a basic studio space for under $200? I say you can, let's see what the numbers say.

I'm assuming that you already own a camera and a tripod. If you own a flash, great, if not, I think we can still accommodate you.

This is stuff I actually use in my current studio:


Adding that all up gives you a total of $199, and, chances are pretty good that you've already got at least some of the things on there. If you own a flash and a table, you've just cut $70 off the $200 studio price. You can save another $15 by ditching the felt in favor of some flat sheets out of your linen closet.

So - how do you do it?

Use the gaffers tape and/or pony clamps to attach the felt to your wall as a backdrop.

Put the CTR-301P transmitter on your camera, put the receiver on the 430EZ. Attach the flash and receiver to the light stand, and point it at your subject. Add some fill with the spotlight.

Create flash modifiers with the foamies and gaffer's tape, attach them to the flash head with the Velcro. You can make snoots, barndoors, bounce cards, gobos - almost anything you'll need with white and black foamies.

Use the table as a work surface, put the project board behind small subjects, or use it as a reflector for large subjects. Bounce the flash off the construction paper to add color, or, use the construction paper as a backdrop or surface.

Dial in the flash power, frame and focus, and let 'er rip.

Other things I've read about used as light modifiers are trash bags, windshield sun shades, bedsheets - the list is endless. You can produce great results without spending thousands of dollars in lighting - and, it's portable!