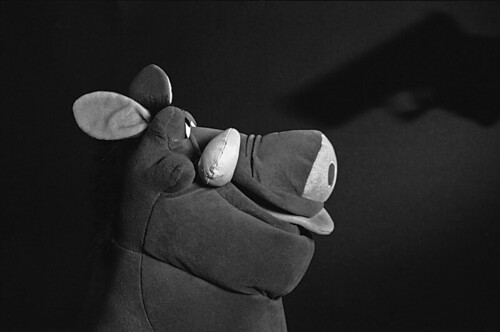
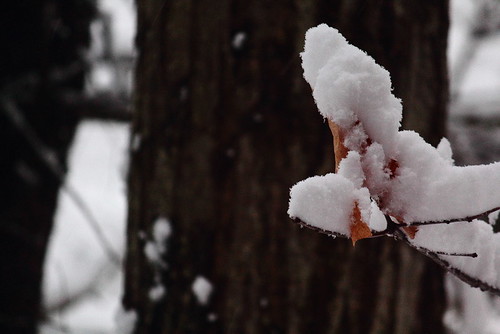
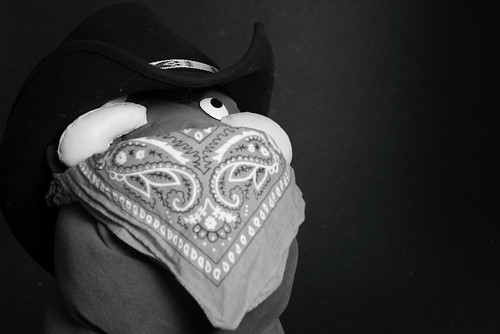
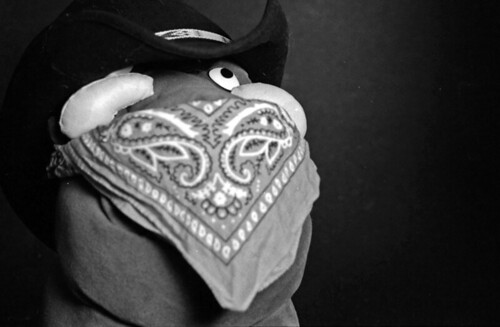
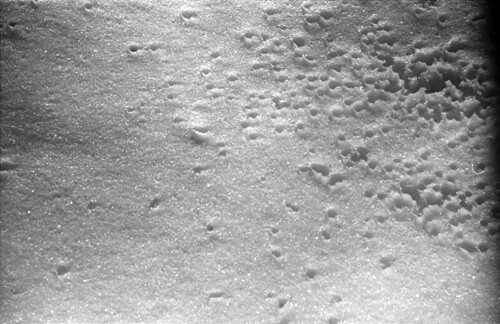
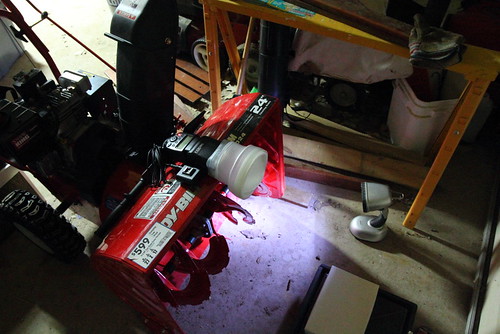
Tonight's shot is in anticipation of the "major snow event" the weather-weenies have been forecasting.
Lighting on this is a combination of flash and LED lantern.
I used the lantern mostly to provide enough light for the camera to focus - it was terribly dark in the garage.
A blog to showcase the non-commercial side of my photography. Find new shots, setup shots, tips, and tricks that I've learned. See my commercial site at http://www.GACPhoto.com
31 March 2011
30 March 2011
POTD 89 of 365
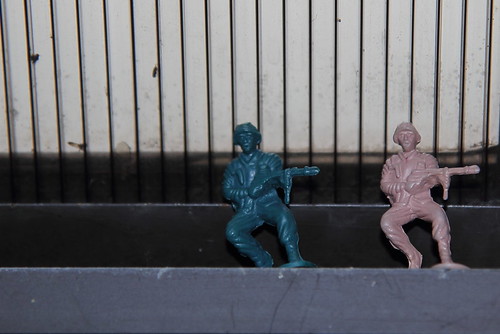
If I had to sum up today's shot with one word, that word would be "meh".
There's a terribly uninteresting story behind it, namely, that this little guys showed up just below the roof line of the "butt hut" (smoking shed) at work.
That's it - told you it was "meh" and told you the story was uninteresting.
There's a terribly uninteresting story behind it, namely, that this little guys showed up just below the roof line of the "butt hut" (smoking shed) at work.
That's it - told you it was "meh" and told you the story was uninteresting.
29 March 2011
POTD 88 of 365
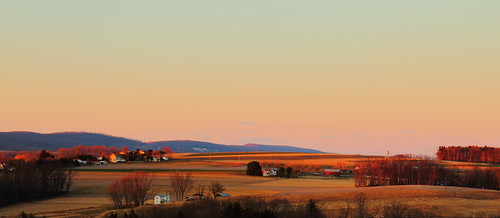
I took a long cut on the way home from work tonight, and ended up in Conyngham (again). I was looking for another sunset picture, and found a small cemetery between Route 93 and S. Main Street in Conyngham.
I drove into the cemetery, and waited.
This is what I got from this expedition:
I'm pretty happy with this. The sun was behind me for this shot, providing a nice light across the landscape, and the sky was just starting to turn purple. I debating waiting a bit, but, for this shot, the landscape was more important than the sky, so I opted to take the shot before it got too dark. I was shooting a pretty tight aperture, around f/8, to maximize my DoF, so, hand-hold-ability was going to become an issue.
28 March 2011
POTD 87 of 365
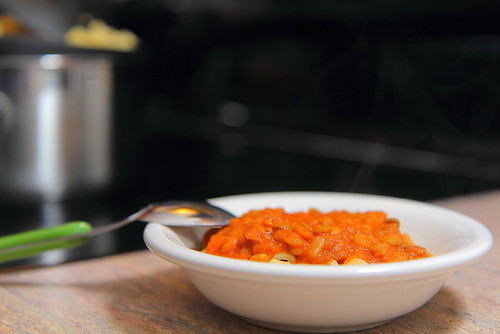
Back to a "normal" shot this evening, complete with setup.
I'm kind of struggling with food shots - this one may be my best yet, but, obviously, that's not saying much. It's pretty bland, and just seems to lack a little something.
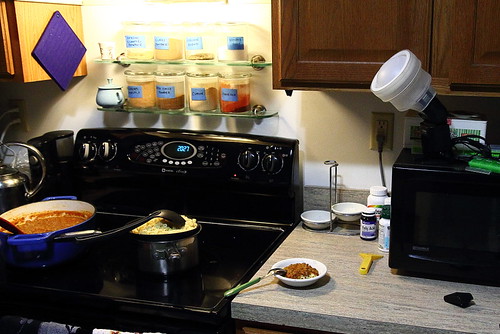
I'm sure it doesn't help that I've done every food shot in the kitchen, which is a bit cramped, and doesn't allow for much in the way of lighting, which segues nicely into the setup shot:
Lighting was the 580EX II at 1/32 with the Fong Lightsphere, triggered remotely with a cheapie.
Metering, ISO, and you. Take 2
This is photo-a-day project is less than 1/4 done, but it's already been a tremendous learning experience for me. While I'm not yet convinced that I'm learning the right things (like composition) I'm getting something out of it.
I figured I'd wait until the film and digital shots were posted to do a recap of what I learned shooting film with off-camera flash.
The first thing I learned is that my flash trigger doesn't work with the EOS 620. That's not as a big a deal as you might think, because the receivers can work in either wireless mode, or, in photo slave mode. To work around the issue, I mounted one of the 430EZ flashes to the hotshoe on the 620, applied a modifier (where needed) or pointed it off to the side (when I didn't want on-axis light) and put the receivers into "light" mode.
When the on-camera flash popped, it popped the off-camera lights. Because my lighting setups normally include light all around the subject, this worked fine.
I learned I need to remember some fundamentals when I'm working solely with strobes. Not least of which is the fact that, by and large, shutter controls ambient, and aperture controls intensity of the flash. For that reason, my bracketed shots didn't show much variation in exposure. It's entirely possible that the variations I did see were due more to the cheap flashes than any real change in exposure.
Does it bother me that I wasted two out of every three shots on the film? A little, but, not near as much as it bugs me to think I might make the same mistake when it counts. Hopefully this is a lesson I'm going to remember. To do this right, I should start at f/8, and then bracket at f/5.6 and f/11. Dropping the shutter speed to the fastest possible sync (1/250 on the 620 and 60D, 1/200 on the Rebel) should completely black out my backdrop.
One positive thing I learned is that I'm getting better with the flashes. Perhaps it's just that I have a good "recipe" in my head for these types of shots (which are, essentially, all the same) but my first shot on the digital with Pig Noir was pretty much dead on. I had to adjust the barndoor a bit, but the camera settings and flash power were right out of the gate, so, there's that.
My film developing process is still undergoing a lot of refinement, but I'm finding that the standard developing method (as posted in the Massive Dev Chart) for my film and developer combination works well enough for now. I'll probably try more adventurous techniques when and if I know I've got a good digital copy of the same shot.
I also learned that a stuffed pig with a pony clamp on its back (to hold on the bandanna) will tip over at the slightest touch.
27 March 2011
POTD 86 of 365
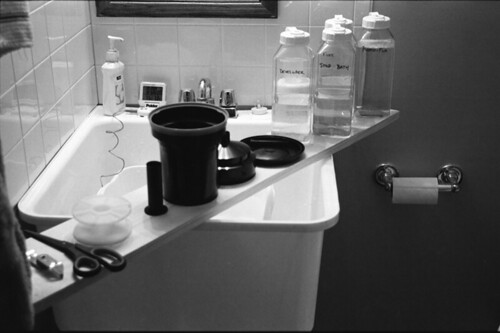
So I shot my darkroom setup, on film, right before I developed the roll.
How meta is that?
From left to right, you can see:
The can opener, scissors, spool, stem, tank, funnel, lid and agitator, chemicals, and a roll of bath tissue. In the back is a digital thermometer keeping an eye on the temperature of the water in the basin.
How meta is that?
From left to right, you can see:
The can opener, scissors, spool, stem, tank, funnel, lid and agitator, chemicals, and a roll of bath tissue. In the back is a digital thermometer keeping an eye on the temperature of the water in the basin.
26 March 2011
POTD 85 of 365
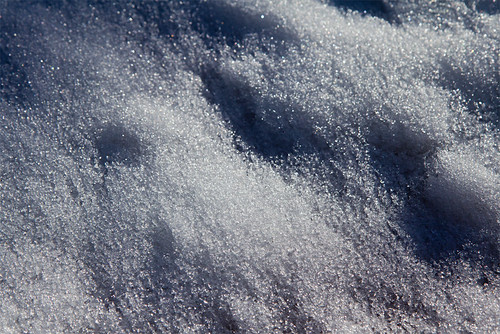
The snow is melting, leaving some pretty interesting textures in the drifts on the porch.
Nabbed it with the 60D as the light was fading this afternoon.
25 March 2011
POTD 84 of 365
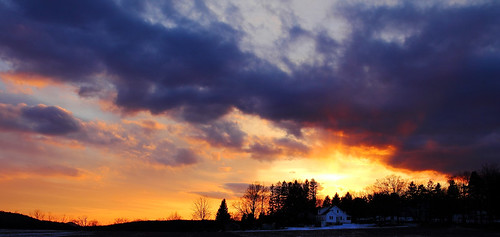
There's a field somewhat close to our house, and it's a great place to view the sunset.
This is today's shot of said sunset:
Contrast tweaked in DPP, and some dodging in PSE finished it up.
This is today's shot of said sunset:
Contrast tweaked in DPP, and some dodging in PSE finished it up.
24 March 2011
POTD 83 of 365
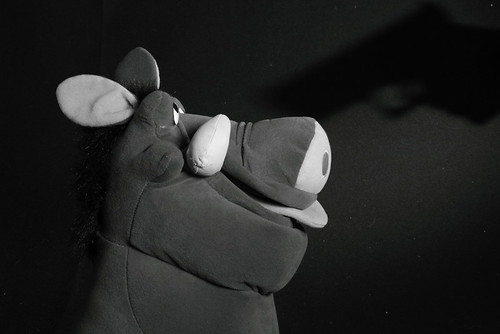
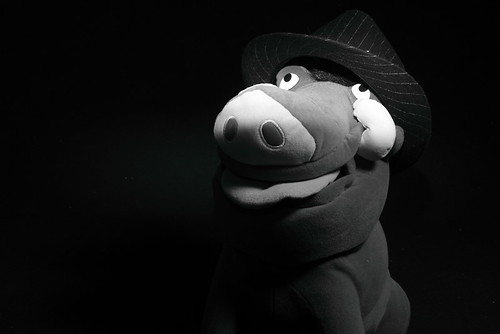
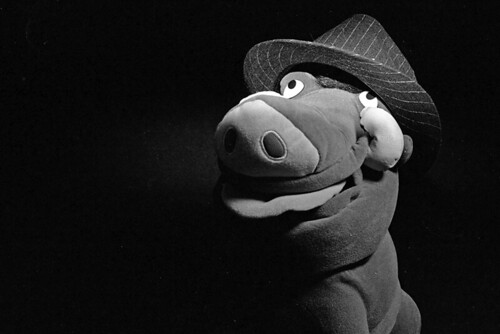
More film - playing with shadows on this shot.
Same as before, dialed it in on the 60D, and popped three bracketed frames on the 620.
The digital version looks like this:
(No stuffed pigs were harmed in the making of this shot!)
(Or this one!)
Same as before, dialed it in on the 60D, and popped three bracketed frames on the 620.
The digital version looks like this:
(No stuffed pigs were harmed in the making of this shot!)
(Or this one!)
23 March 2011
POTD 82 of 365
It snowed, and is still snowing. If you look closely at this image (something I do not recommend with my pictures) you can make out the flakes still falling.
I did not want to post another shot of this little leaf this year, because I knew if I felt compelled to make another image of the leaf, it would most likely mean it was covered in snow.
22 March 2011
POTD 81 of 365
More Film!
Less Pigs!
I'm going to shoot film all week, develop it on Saturday, and scan / post on Sunday. I'm taking a bit of a risk here, as these are all studio shots, using manual, off-camera flash, and I only have my non-scientific test results to tell me that my 60D meters the same as the 620.
It's exciting!
And I lied about less pigs. This shot was (believe it or not) better than what I had in mind originally, which is saying something, because I really dislike this one.
The digital:
The film:
Seeing this on film doesn't make me like it any more.
21 March 2011
POTD 80 of 365
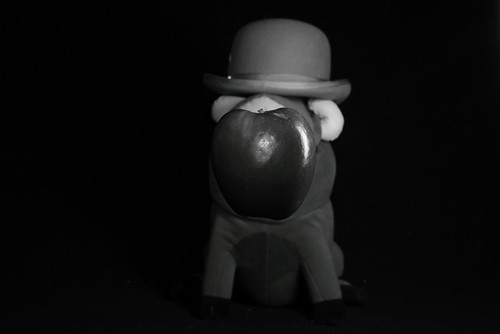
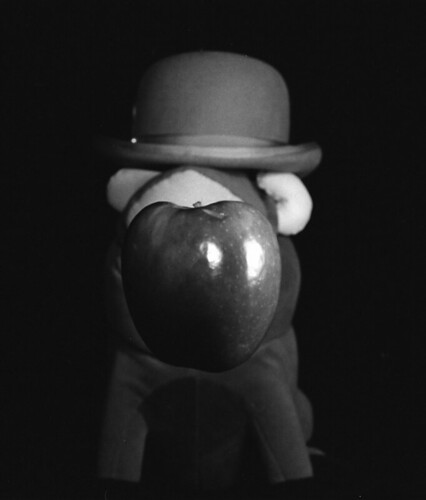
More pigs on film this evening.
Same sequence as yesterday - nail it down with the 60D, and then three bracketed shots with the 620.
I may have the roll finished by the weekend.
Here's the digital shot:
I'm calling this "Son of Ham", a ridiculous, and potentially insulting homage to René Magritte.
As you can see, I did a terrible job of removing the fishing line holding the apple on the digital shot. The film version promises to be much better.
The film:
My focus and/or aperture must have been off on this. It looks wretched.
20 March 2011
POTD 79 of 365
Building on my post from yesterday, Metering, ISO, and You, I decided to put this to practical use.
The 620 is loaded with Tri-X, and is set to its native film speed of 400, because I didn't want to introduce another variable into the mix.
I dialed in the shot I wanted with the 60D, set to ISO 400, and kept the aperture and shutter in the limits of what the 620 and lens can do.
When that was done, I framed the same shot with the 620, put the flash transmitter on that one, and fired off a few frames, bracketing the shot to hedge my bets a little.
It may take a bit before this one hits the blog, because I don't want to burn this roll too quickly, but, when it does make it up here, I'll be posting the digital reference shot, too, just to see how I did.
As a little teaser, Poomba makes his return!
The digital reference shot:
Yes indeed - pig noir again.
And, the film:
19 March 2011
POTD 78 of 365
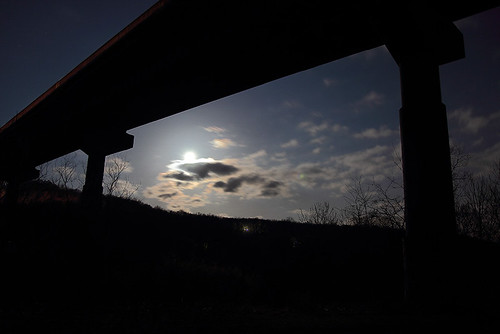
The Missus and I went out in search of the Super Moon this evening. It was an inauspicious start, as we were traveling under heavy cloud cover. The sequence of events, and locations, as I recall them, were as follows:
Out of Drums down St. John's Road.
From St. John's Road to someplace in Conyngham.
Conyngham back to Drums, on a different road (but parallel to St. John's).
Drums to the Stagecoach Inn - skipped taking a shot there.
Stagecoach to Mountain Top.
Mountain Top to North Main.
North Main to 437 Northbound.
437 to Brown Street.
Brown Street is a dead end.
Brown Street to 309 South.
While on 309 South, near St. Jude's Church, we finally saw the moon.
309 South to Church Road.
Church Road to 437 Southbound.
437 had nowhere good to pull over and see the moon.
437 to White Haven.
White Haven to the Lehigh Gorge State Park.
Lehigh Gorge State Park, under Route 80.
That took around 1/4 tank of gas.
All that for this:
The moon certainly was bright. Obviously, I would have liked to have taken this a little closer to sunset, to try get a little more ambient into the shot, but, overall, it's OK.
Took it into Photoshop for a fairish bit of dodging and teeny bit of burning. I wanted to recover as much of the light on the overpass as I could.
I also shot an entire roll of Tri-X. Apparently, longer exposures benefit from a slightly different development method, and, I didn't want to have compromise either these shots, or shots taken at a faster shutter, so I decided to burn the whole roll.
Metering, ISO, and you
Most of my POTD shots to date have been shot with one of two cameras. If I'm shooting digital, it's the Canon EOS 60D, if I'm going analog, it's the Canon EOS 620 with (so far) Tri-X 400. There is, of course, a reason for that. I really like both of these cameras. They're both big, which is nice because I have meaty paws, they both feel solid, and, oddly enough, the shutter on both just sounds great.
So, what do these two cameras, as different as apples and elephants, have in common? They meter the same. That's important because I'd like to start doing some work with off-camera flash on the film camera.
My testing was not the most scientific, perhaps, but, I suspect it's going to be close enough. Here's what I did:
60D
Aperture Priority Mode
f/5.6
ISO 800
31mm focal length (50mm FF equivalent)
620
Aperture Priority Mode
f/5.6
ISO 800
50mm focal length
I framed the same shot with both cameras, and noted the exposure time. On both cameras, it was the same.
I set up a different shot, metered it with both cameras. Same exposure.
Closed the aperture to f/11 - same exposure time on both cameras.
Opened the aperture to f/4 - same exposure time on both cameras.
I changed the ISO on both to 400 (which is native the Tri-X film) and repeated the above tests. Same exposure from camera to camera.
For a novice film shooter like me, this is huge. I can setup a studio shot with the off-camera flash, dial it in on the 60D, and once I get what I like, can replicate the same shot on film. Is that earth-shattering in the grand scheme of things? Absolutely not! I can, however, see a good use for that when I'm working on some noir images. I suspect they'll look better on film.
Just my little moment of photographic zen for the day.
18 March 2011
POTD 77 of 365
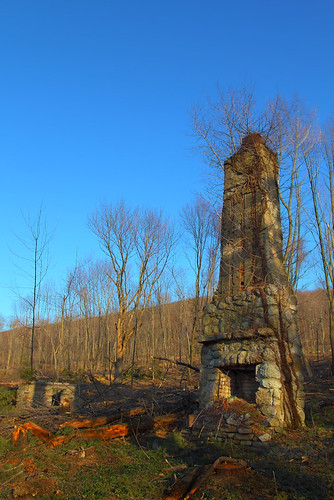
Everything lined up today for a shot I've been itching to take for months. I was wearing jeans and sneakers, for a short trek through some woods, the light was OK (not great, unfortunately), there was no snow on the ground, and my back isn't giving me much grief. Because I knew all but the the light and my back would cooperate, and I suspected those would be OK too, I tossed the good camera in my bag this morning, and I took this on the way home from work today.
There's a feature in Dorrance, right off the 81 exit, that's locally known as "The Standing Fire". It's an old chimney, sitting in the middle of the woods, and, like all odd things, you'll hear that it's haunted, and you can either:
A. Smell smoke
or
B. Hear voices
I don't put much (read: any) stock in any of that, but, since a company started felling most of the trees in the area surrounding the chimney, I've been a little concerned about a not-well-documented piece of local history, and wanted to grab a shot.
This shot had a ton of work done to it. To start, it's three exposures, merged using Picturenaut, and then brought into PS for some dodging and burning.
Instead of the D&B tools, which I've found to be miserable to correct if it goes wrong, I added a D/B layer by creating a 50% gray layer in "Overlay" mode.
Burned areas got painted black, with a large brush at 8% opacity. Dodged areas got painted white with the same brush.
I bumped up the vibrancy a bit (and, may have been a bit ham-fisted there), spun it down to a JPG, and there it is, after a crop to remove some of the negative space at the top of the shot.
Pretty happy with this one.
17 March 2011
POTD 76 of 365
So - my first foray into push processing went...That's it, just went.
The negs are still wet, so, I can't scan them yet, but, to my untrained eye, they look underexposed. I can see detail, to be sure, but, they're very light right now, which, of course, translates into very dark once the colors get inverted. We'll see how they turn out.
I've also got a milky streak on my negatives that I've never seen before. It looks like it wasn't fixed enough, but, if anything, I over-fixed and over-agitated it, because my previous two development cycles left me with purple negatives, and I'd hoped to remedy that by a slight increase in fixing time, coupled with a longer and more vigorous rinse. It may be that the streaks will disappear as the negs dry, and the only reason I've never seen this before is that I didn't scrutinize my wet negatives the same way I've examined these.
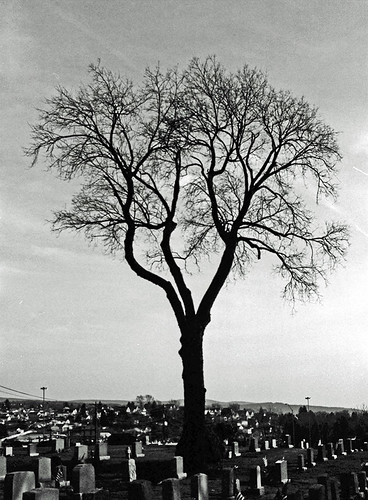
In shooting-related news, I took a few shots of a tree today, once with a red filter, one with green, and one with yellow. Of the three, I expect the yellow will be the one I like the most, but, that's all going to depend on the exposure now, isn't it?
We'll see where it goes. The negs are drying pretty quickly, so, I may kill some time to see if I can put at least 12 frames on the scanner before bed.
And, yup. Way too dark. Pretty much all of the shots on the roll were too dark. I fixed what I could in Photoshop, but, it appears I need to either increase my development times, or, maybe just pick a lower ISO on the camera.
No detail on the tree, and this required a ton of adjustment in PS. Well, live and learn, right?
16 March 2011
POTD 75 of 365
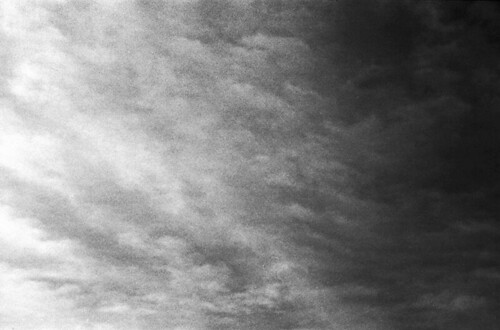
So, I'm a little gimped up still, but, I snagged a few shots of the sky today, on film, with a deep red filter.
I'm expecting (read: hoping) to see a dark sky with very white clouds. I metered for the clouds, then pushed the exposure up three stops to put the clouds in Zone 8, so, we'll see what happens.
So - that's what happened. This entire roll was underexposed or underdeveloped, but, I did get (mostly) the effect I was expecting, so, there's that.
15 March 2011
POTD 74 of 365
Placeholder this evening - trying a new (to me) film technique, and I'm trying to burn up this roll as quickly as possible.
Basically, I've got my camera set to ISO 1600, with a film speed of 400. Once the roll is shot, I'll "push" the film by increasing the developing time to try to bring out the detail in the otherwise underexposed film.
I know D76 developer isn't ideal for push processing, so I'm expecting some pretty grainy results, but, it's what I've got, and, quite frankly, the vast majority of my shots would have been better if I'd left the lens cap on, so a little grain won't hurt.
We'll see what we get when we get it.
And, we got it.
Blurry - ISO 1600 (especially on ISO 400 film) is still a little to slow to hand-hold indoors, at night, with a filter, but, I kind of knew that based on how the camera metered. Still, I took the shot, so, I've got nobody to blame but myself.
14 March 2011
POTD 73 of 365
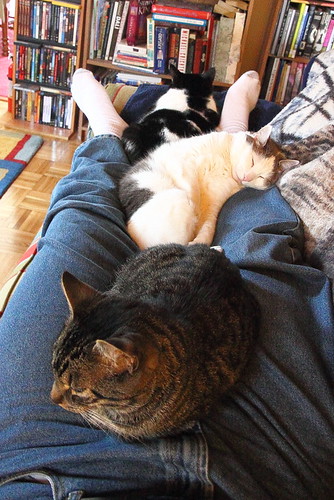
Still mostly down with a back injury, so today I spent some time holding down the couch. While I was actively engaged in thwarting the couch's attempts to negate gravity, the cats decided to assist by holding me down as well.
We were, needless to day, quite successful.
13 March 2011
12 March 2011
POTD 71 of 365
I've managed to do something to my back, and it's the worst it's ever been, so today's shot is on Flickr, but I haven't been able to figure out how to post it here yet from my iPhone.
And there it is. The Missus brought my laptop in the bedroom for me.
11 March 2011
POTD 70 of 365
Yesterday's POTD hit the blog at around 01:30, because I was awake, checking the swales, drains, and various other water handling devices that are oh-so-vital to keeping a home built at the bottom of a bowl dry.
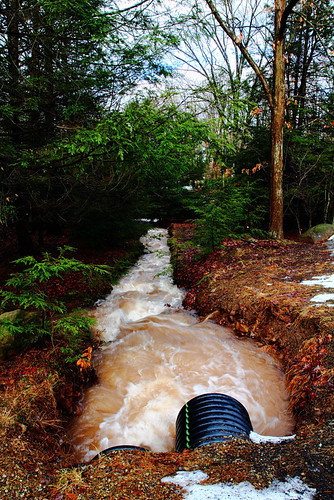
This is what the receding waters looked like this morning at around 08:00:
For a little backstory, The Missus and I have spent many, many sleepless nights when it rained. In 2006, we ended up with 8-10 inches of water in the house, all of it runoff. To fix it, over two years, I installed three trench drains, widened and built-up behind my swale, installed retaining walls, and peppered the basement with water alarms.
Complicating the water issue is the fact that we've got a pond uphill from us that flows down through the neighbor's yard, and then passes under our street right next to our driveway. When the pond fills up, the stream overwhelms its banks, crosses the road, and ends up in my swale.
What's frustrating, though, is every time I fix something, the equation changes. Over-building in my development has reduced greenspace and runoff collection areas well beneath a bare minimum requirement. People who wouldn't be qualified to own a Lego playset are tasked with approving building plans that should be scrutinized by a civil engineer, and bad decisions are made. Lazy residents who couldn't be bothered to keep their yards and swales cleared of debris make a wretched situation a recipe for disaster, and disaster struck (again) last night.
*Deep breath*
OK - I'm through ranting. There's my picture. I had a bunch more that showed a sample of the devastation, but, they were full of purple-fringing, and looked terrible. This morning's sky was pure white, and, even stopped down to f/9, I couldn't get the lens to stop producing CA, and, I really didn't feel like cleaning it up in Photoshop tonight. I'm beat.
POTD 69 of 365
So, yeah, this is getting posted at 01:30 in the morning on the day after the shot is "due", but, since I'm still up, I reckon it counts.
I've been watching the stream across the street from my house slowly work its way across the road, and into my swale. If it overwhelms the swale, I'm not convinced the two drains I put in two summers ago will handle it. If that happens, I know the drain I put in in front of the garage door three summers ago won't handle it, and, if that happens, my house gets wet.
Very, very wet.
So far, so good, and I've been walking the property once an hour since around 7:00 this evening. It's going to be a long night.
Anywho - here's the shot. It's a ceiling tile from the office. Not terribly exciting, I know, but, I've shot mostly textures on this particular roll.
10 March 2011
Let's turn off the light and see what develops...
I am an information junkie.
Before I purchased a film camera, I researched them, and found one that would be versatile enough to shoot "weird" films (Neither the EOS 650 nor EOS 620 use an infrared film counter, meaning they won't fog IR film).
Before I purchased film, I researched different developing chemicals. I learned the difference between C-41, E-6, and D-76 processes (Color Negative, Color Positive, and Black and White, respectively). I found the most common (but, not necessarily the best) Black and White developing chemicals are the Kodak chemicals, and their clones. Consequently, there was a ton of information I could study about using those chemicals in film developing.
Before I purchased the chemicals and the kit, I read about the process. What I read didn't seem too intimidating, aside from the few steps that need to be performed in total darkness, so, I practiced them as much as I could. There are numerous tips and tricks out there, and I read quite a few. I also dismissed one or two, but, I'll get into that.
Without any further ado, and, if you're interested, this is how I develop a roll of film. Your mileage may vary, don't try this at home, not responsible for trashed negatives, ruined images, or broken dreams. Void where prohibited by law or common sense.
My kit:
- A rounded-end bottle opener
- A pair of scissors
- A digital cooking thermometer with probe
- (3) Rubbermaid Gallon Jugs
- (4) Quart Bottles
- (1) 18-Quart Dish Tub
- (1) Paterson Universal Tank and Reel
- Kodak D76 Developer
- Kodak Indicator Stop Bath
- Kodak Fixer with Hardener
- Kodak Photo-flo
- Film Clips
- The Massive Dev Chart Mobile App
This assumes you've mixed up the chemicals according to their directions. For the Developer, Stop Bath, and Fixer, I mix a gallon at a time in the Rubbermaid Gallon Jugs. The Photo-Flo gets mixed 500ml at a time in one of the quart bottles. All the bottles are marked in multiple locations with a sharpie with their purpose (Developer (D), Stop Bath (S), Fixer (F), Photo-flo (R - for "rinse aid"))
Fill the 18-quart tub with 68-degree water. Put 500ml of each chemical in its respective quart-sized bottle. Making sure the caps are on tightly, put the bottles in the washtub full of water. Leave them in there until the contents of the bottles are at 68 degrees. Hint: Keeping your darkroom at 68 degrees makes this step quick and easy!
In mytiny downstairs bathroom high-tech darkroom, I place a board across the utility sink, and line up the following items, in the following order from left to right:
Roll of film
Can opener
Scissors
Film reel
"Stem" for tank
Tank
Funnel for tank
Agitator rod for tank in the tank lid
Here's where it gets fun.
I put my mobile phone and any other potential light source outside the bathroom. I turn off the lights, close the door, and (if needed) block the bottom of the door with a towel.
Now, I wait. I give myself about two minutes in the pitch black to see if I can pick out any light sources. If I did, I'd fix them. Assuming all is good, then, I start in on the film.
Pop the end of the film roll without the stem off, using the can opener. I toss this in the shower stall. Pull the film out, and I wind it backwards until I get to the spool. Basically, this puts the leader all the way inside the roll of film.
Using the scissors, I cut the tape holding the film to the spool. Films are assembled differently. Tri-X has a nice taped design that makes cutting simple, and you should only have to cut the tape, not the film itself.
At this point, many, many tutorials will tell you to cut off the leader. This is one where I differ from conventional wisdom. I leave the leader on for easier handling later. I don't suspect developing the leader is causing any harm.
Now, I load the film onto the reel, starting with the last frame and working my way up to the leader. The new plastic reels with their ratcheting mechanism make this tremendously simple, but, practice is the key. Buy the cheapest roll you can find and practice loading it in the light before you take a swing at it in the dark. In particular, learn to listen to what it sounds like when the film starts to jam, and learn what it feels like as the film is loading properly (it'll move smoothly forward on the forward stroke, and should just lightly twitch once on the back stroke).
Then, I put the reel on the stem, put the stem in the tank, lock in the funnel (which in theory makes the tank light-tight) and insert the agitator rod.
Then I breathe. I can turn on the lights, wipe the sweat off my forehead, and chuckle nervously. Once that's done, the actual development process begins.
Grab the cell phone, and fire up the Massive Dev Chart mobile app. If you have an iPhone, and you develop film, spend the $7.00 and get this. You will not regret the purchase. If you can't use the app, you'll need to have your times written down, and a stopwatch handy.
For Tri-X 400 in 500 ml of "stock" (i.e. Mixed according to Kodak's instructions) D76 at 20C, this is the "recipe" I use.
Developer
6:45
Agitate for the first 90 seconds, and then for 10 seconds at the top of each minute.
Dump the developer down the drain
Stop Bath
1:00
Constant Agitation
Pour the stop bath back into the 1-quart bottle
Fixer
5:00
Agitate for the first minute, and then for 10 seconds at the top of each minute.
Fixer goes down the drain
Photo-flo
2:00
Constant light agitation
Photo-flo goes down the drain
At this point, I'll pull the funnel and agitator rod out.
Rinsing
10:30
Periodic agitation / dump and refill the tank. Constant flow of clean water
Once that's done, I grab the leader (carefully) and (carefully) remove the film from the reel. Then I (carefully) punch the teeth on the unweighted film clip through the unprinted portion of the film with the tape on it. I unroll the film all the way (although, by this point, it's not too curled up), cut off the leader, and (carefully) put the weighted clip on the bottom of the film.
That's it. I'll let them dry for a few hours, then scan them.
Before I purchased a film camera, I researched them, and found one that would be versatile enough to shoot "weird" films (Neither the EOS 650 nor EOS 620 use an infrared film counter, meaning they won't fog IR film).
Before I purchased film, I researched different developing chemicals. I learned the difference between C-41, E-6, and D-76 processes (Color Negative, Color Positive, and Black and White, respectively). I found the most common (but, not necessarily the best) Black and White developing chemicals are the Kodak chemicals, and their clones. Consequently, there was a ton of information I could study about using those chemicals in film developing.
Before I purchased the chemicals and the kit, I read about the process. What I read didn't seem too intimidating, aside from the few steps that need to be performed in total darkness, so, I practiced them as much as I could. There are numerous tips and tricks out there, and I read quite a few. I also dismissed one or two, but, I'll get into that.
Without any further ado, and, if you're interested, this is how I develop a roll of film. Your mileage may vary, don't try this at home, not responsible for trashed negatives, ruined images, or broken dreams. Void where prohibited by law or common sense.
My kit:
- A rounded-end bottle opener
- A pair of scissors
- A digital cooking thermometer with probe
- (3) Rubbermaid Gallon Jugs
- (4) Quart Bottles
- (1) 18-Quart Dish Tub
- (1) Paterson Universal Tank and Reel
- Kodak D76 Developer
- Kodak Indicator Stop Bath
- Kodak Fixer with Hardener
- Kodak Photo-flo
- Film Clips
- The Massive Dev Chart Mobile App
This assumes you've mixed up the chemicals according to their directions. For the Developer, Stop Bath, and Fixer, I mix a gallon at a time in the Rubbermaid Gallon Jugs. The Photo-Flo gets mixed 500ml at a time in one of the quart bottles. All the bottles are marked in multiple locations with a sharpie with their purpose (Developer (D), Stop Bath (S), Fixer (F), Photo-flo (R - for "rinse aid"))
Fill the 18-quart tub with 68-degree water. Put 500ml of each chemical in its respective quart-sized bottle. Making sure the caps are on tightly, put the bottles in the washtub full of water. Leave them in there until the contents of the bottles are at 68 degrees. Hint: Keeping your darkroom at 68 degrees makes this step quick and easy!
In my
Roll of film
Can opener
Scissors
Film reel
"Stem" for tank
Tank
Funnel for tank
Agitator rod for tank in the tank lid
Here's where it gets fun.
I put my mobile phone and any other potential light source outside the bathroom. I turn off the lights, close the door, and (if needed) block the bottom of the door with a towel.
Now, I wait. I give myself about two minutes in the pitch black to see if I can pick out any light sources. If I did, I'd fix them. Assuming all is good, then, I start in on the film.
Pop the end of the film roll without the stem off, using the can opener. I toss this in the shower stall. Pull the film out, and I wind it backwards until I get to the spool. Basically, this puts the leader all the way inside the roll of film.
Using the scissors, I cut the tape holding the film to the spool. Films are assembled differently. Tri-X has a nice taped design that makes cutting simple, and you should only have to cut the tape, not the film itself.
At this point, many, many tutorials will tell you to cut off the leader. This is one where I differ from conventional wisdom. I leave the leader on for easier handling later. I don't suspect developing the leader is causing any harm.
Now, I load the film onto the reel, starting with the last frame and working my way up to the leader. The new plastic reels with their ratcheting mechanism make this tremendously simple, but, practice is the key. Buy the cheapest roll you can find and practice loading it in the light before you take a swing at it in the dark. In particular, learn to listen to what it sounds like when the film starts to jam, and learn what it feels like as the film is loading properly (it'll move smoothly forward on the forward stroke, and should just lightly twitch once on the back stroke).
Then, I put the reel on the stem, put the stem in the tank, lock in the funnel (which in theory makes the tank light-tight) and insert the agitator rod.
Then I breathe. I can turn on the lights, wipe the sweat off my forehead, and chuckle nervously. Once that's done, the actual development process begins.
Grab the cell phone, and fire up the Massive Dev Chart mobile app. If you have an iPhone, and you develop film, spend the $7.00 and get this. You will not regret the purchase. If you can't use the app, you'll need to have your times written down, and a stopwatch handy.
For Tri-X 400 in 500 ml of "stock" (i.e. Mixed according to Kodak's instructions) D76 at 20C, this is the "recipe" I use.
Developer
6:45
Agitate for the first 90 seconds, and then for 10 seconds at the top of each minute.
Dump the developer down the drain
Stop Bath
1:00
Constant Agitation
Pour the stop bath back into the 1-quart bottle
Fixer
5:00
Agitate for the first minute, and then for 10 seconds at the top of each minute.
Fixer goes down the drain
Photo-flo
2:00
Constant light agitation
Photo-flo goes down the drain
At this point, I'll pull the funnel and agitator rod out.
Rinsing
10:30
Periodic agitation / dump and refill the tank. Constant flow of clean water
Once that's done, I grab the leader (carefully) and (carefully) remove the film from the reel. Then I (carefully) punch the teeth on the unweighted film clip through the unprinted portion of the film with the tape on it. I unroll the film all the way (although, by this point, it's not too curled up), cut off the leader, and (carefully) put the weighted clip on the bottom of the film.
That's it. I'll let them dry for a few hours, then scan them.
09 March 2011
POTD 68 of 365
Film! And, the roll is spent!
Time permitting, I should have this developed tomorrow night, and the shots will be posted Friday once the negs dry.
So, yeah.
Time permitting, I should have this developed tomorrow night, and the shots will be posted Friday once the negs dry.
So, yeah.
08 March 2011
POTD 67 of 365
Film again!
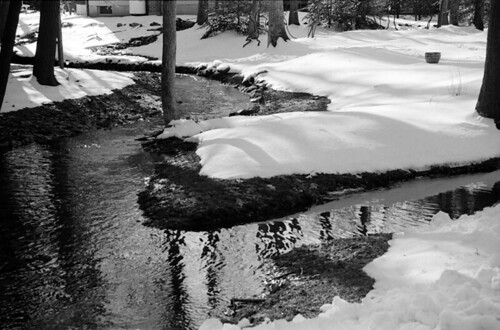
There's a (hopefully decent) shot of a stream on the roll that I can't wait to see.
The roll's almost spent, expect a picture soon.
And, this isn't the shot of the stream, obviously. That's getting posted for tomorrow.
There's a (hopefully decent) shot of a stream on the roll that I can't wait to see.
The roll's almost spent, expect a picture soon.
And, this isn't the shot of the stream, obviously. That's getting posted for tomorrow.
07 March 2011
POTD 66 of 365
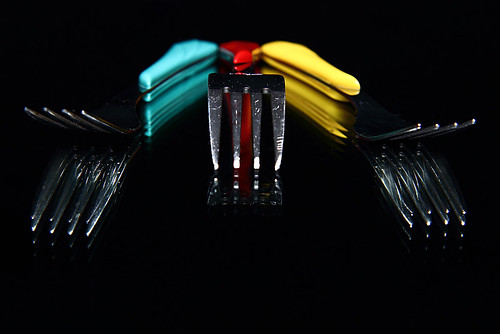
So, I did shoot more film today, but, I feel pretty bad about not posting any new shots, so, I figured I'd take one in the Psteudio.
That said, tonight's shot:
I didn't snag a setup shot, because it's not all that exciting a shot. Three forks on a mirror, and the 580EX II through a softbox at 1/4 far above them to give the impression of a big light source. The lens is only slightly above the plane of the forks.
That said, tonight's shot:
I didn't snag a setup shot, because it's not all that exciting a shot. Three forks on a mirror, and the 580EX II through a softbox at 1/4 far above them to give the impression of a big light source. The lens is only slightly above the plane of the forks.
06 March 2011
POTD 65 of 365
More film today. There's something very satisfying about using film. To date, I've been shooting Tri-X 400, but, I've got a few rolls of Ilford SFX-200 Infrared, and, a roll of Fuji Velvia 50 waiting in the wings until I'm a little more comfortable with the camera.
I've still got a few more shots left on the roll, but, I expect to have these developed and scanned within the next few days.
Woo!
I've still got a few more shots left on the roll, but, I expect to have these developed and scanned within the next few days.
Woo!
05 March 2011
POTD 64 of 365
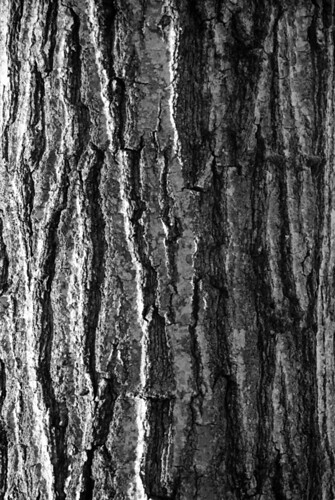
I shot some more film today. I'm dedicating the entire 24 exposures on this film to textures. I got some tree bark, some stone, and some water today.
Once the roll is spent, I'll develop it, scan it, and post it, so, this one's just a placeholder for now.
Let's hear it for tree bark!
Once the roll is spent, I'll develop it, scan it, and post it, so, this one's just a placeholder for now.
Let's hear it for tree bark!
04 March 2011
POTD 63 of 365
I went to a new barbershop today for a haircut and a hot lather shave. If you're a guy in Northeastern Pennsylvania, and you're not going to Big Daddy's Barbershop, you're doing it wrong.
Joey hooked me up with a great haircut that perfectly compliments the handlebar mustache I've been sporting, and the shave was a transcendental experience. My normal razor is a straight razor (and there's a picture there, believe me) so I thought I knew what I was in for. I was wrong.
But, I digress. The haircut and the mustache seemed to want a tie and some suspenders.
As much as I hate being on this side of the camera, I'm quite pleased with the look itself:
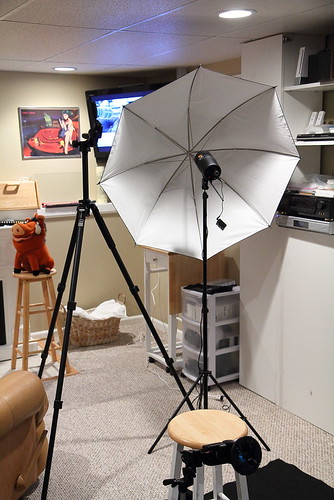
Setup is pretty basic. The big strobe into a reflective umbrella at about 1/4 power, and a 430EZ at 1/4 power and two Rosco Cerulean Blue gels (to avoid white bands) lighting the backdrop.
Mad Men it ain't, but, still pretty tight.
03 March 2011
POTD 62 of 365
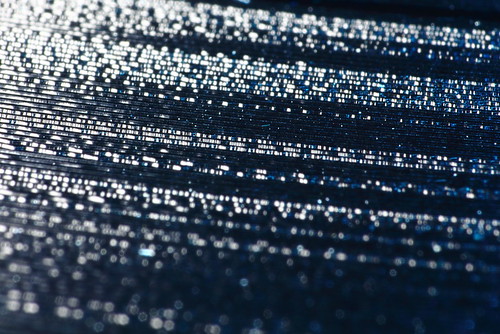
Gotta cop to busting out the macro crutch this evening, but, I dig the abstract shots I'm getting out of this.
Tonight's subject is somewhat topical - I've been playing with film lately, so, I figured I'd dig up yet another dinosaur:
I'm not going to keep you in suspense. What you're looking at is a tiny portion of a record.
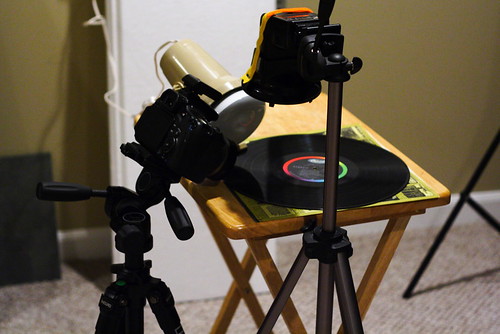
Setup is a little more ambitious than my normal macro shot. In addition to the worklight, I've added one of the 430EZs at full power with a Rosco Cerulean Blue gel on it.
The lens is the 18-55 kit lens, mounted backwards on the body, at f/22.
02 March 2011
POTD 61 of 365
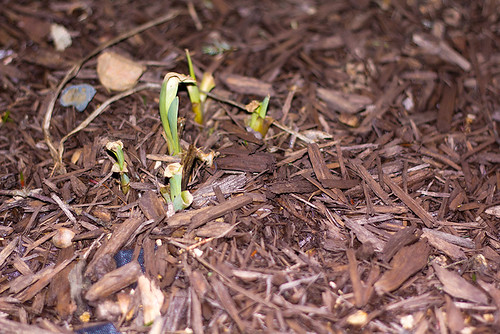
We have green things popping up in our planter.
These are the first shoots from the Scarlet Lady Daylillies we planted last year - what's left of them after the deer got to them, at any rate:
Regardless of the fact that our ravenous fauna tend to destroy our carefully tended flora, it's wonderful to see something growing again.
I also heard geese this morning, which pretty much made my day.
01 March 2011
POTD 60 of 365
This evening, I went to dinner with a friend I haven't seen since the first of the year. He and I ate way too much, and spent way too long in the cold chatting. In the midst of said chatting, he and I also took some pictures.
This is what I got for tonight's shot:
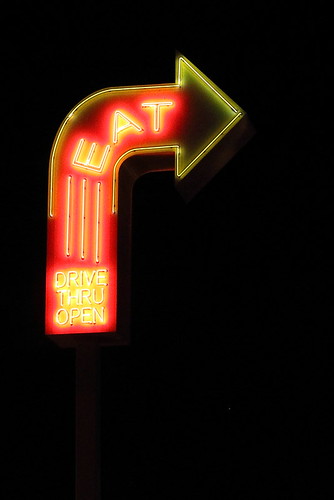
This is the sign that greets you as you pull into the Quaker Steak and Lube in Bloomsburg.
This is what I got for tonight's shot:
This is the sign that greets you as you pull into the Quaker Steak and Lube in Bloomsburg.
Subscribe to:
Posts (Atom)